Mac instructions
These instructions are from Qualitative Data Analysis with ATLAS.ti (Third Edition), Chapter 2: Getting to know ATLAS.ti, copyright © Susanne Friese 2019.
These instructions are for version 8.3 of ATLAS.ti with the MacOS operating system.
Getting to know ATLAS.ti
For this chapter, you will work with the ‘Children and Happiness’ sample project that you find on the online resources website. You can play around with the project material and explore as many functions and possibilities as you like – you do not have to be afraid of causing any severe damage. It is just ‘dummy’ material!
- Open ATLAS.ti.
Currently the interface is available in English, German, Spanish, Portuguese and simplified Chinese. ATLAS.ti recognizes the language of your operating system and adjusts the display language automatically. All instructions in this book will be using the English language interface. On a Mac, you need to change the language of the operating system to English if the ATLAS.ti interface should be in English.
Next, download the sample project for this chapter. The project name is ‘Children & Happiness sample project (Chapter 2)’ and import it into ATLAS.ti.
- From the Opening Screen, select Import an ATLAS.ti project.

Figure 2.1 Import Project Bundle
Below you see the main features of the ATLAS.ti Mac interface:
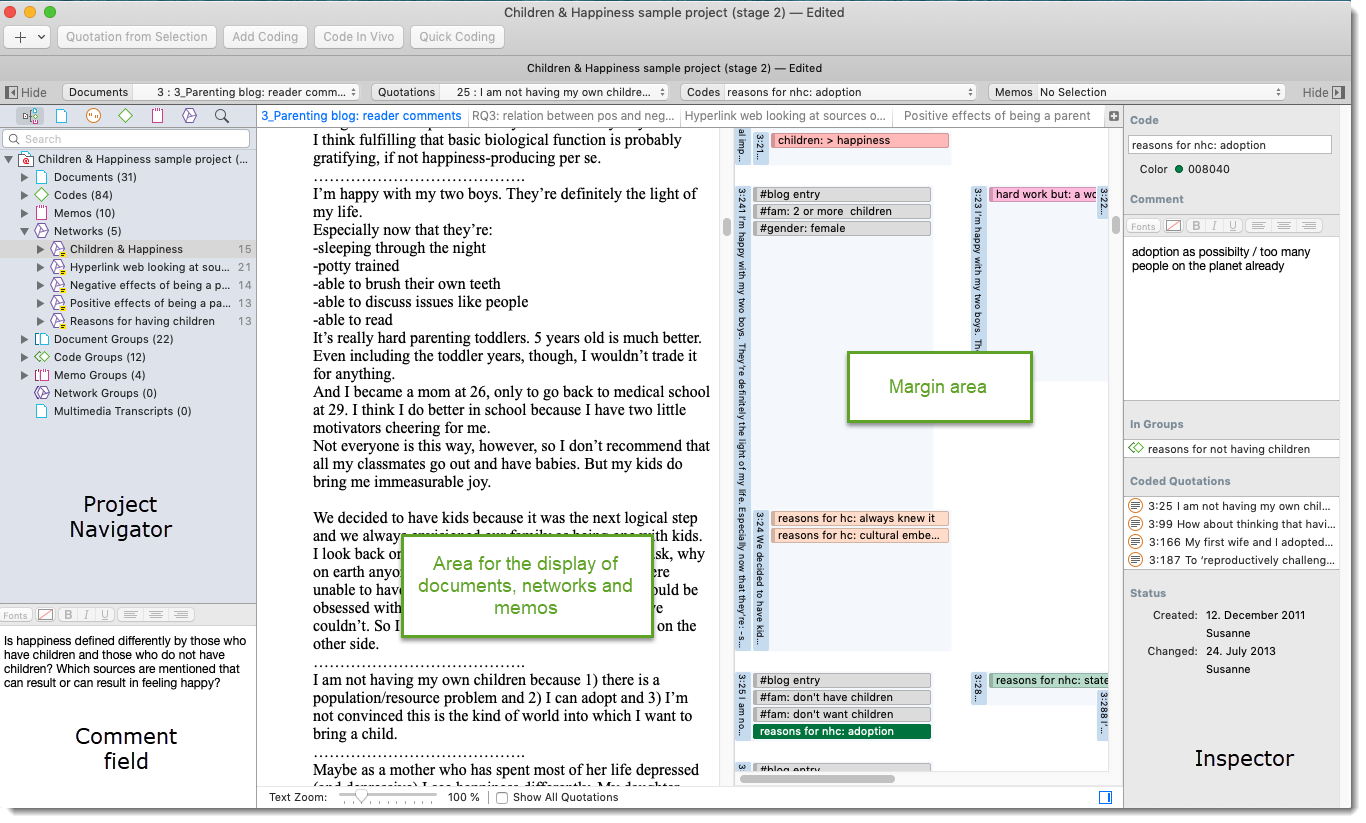
Figure 2.2 The ATLAS.ti Mac user interface
The different types of entities are represented by these symbols:
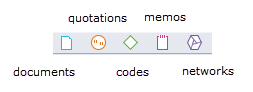
Figure 2.3 Entity icons
Project Explorer in the navigation pane
On the left-hand side of the main editor you find the navigation panel. It opens automatically if you start the software and displays the project explorer.
- To open a branch, click on the triangle in front of each entity, or right-click and select Expand from the context menu. With a double-click on a main branch, the respective manager of the selected entity type opens.
- You can also open the Project Explorer as separate window. Select TOOLS / PROJECT EXPLORER.
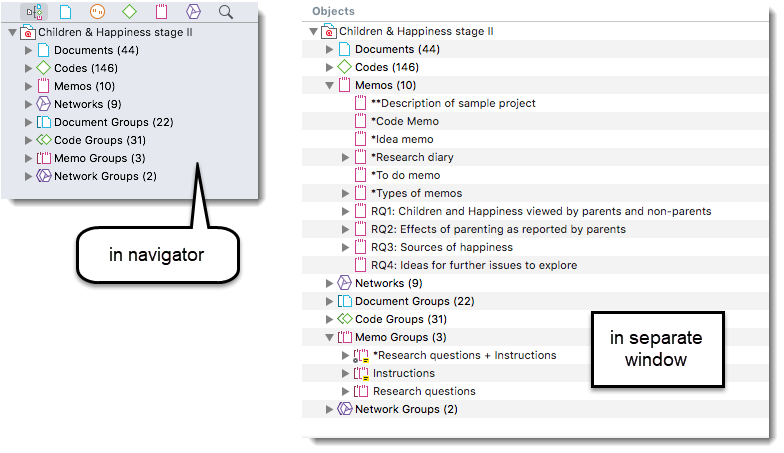
Figure 2.4 Project Explorer in the navigation panel
From the main branches you can access the different entity types that you will be working with in ATLAS.ti. These are documents, codes, quotations, memos, networks and the various entity groups. If an entity has a comment, it is displayed at the bottom of the navigator. You can write, review and modify comments in this field.
- The entity managers allow access to the entities, where you can review, edit, manage, and query them. The easiest way to open a manager is by double-clicking on the branch for Documents, Codes, Memos, etc. in the Project Explorer in the navigation panel on the left (see above).
- Alternatively, you can double-click on the buttons for each entity list, or select the SHOW [ENTITY TYPE] MANAGER from the respective main menu, i.e. you open the Document Manager from the Document menu, the Quotation Manager from the Quotation menu, and so on.

Figure 2.5 Open Entity Managers
Each manager has a list of the entities it manages and some detailed information about them. At the bottom of the list is a preview field. In the Document, Quotation and Code Manager you can preview the content of the selected document, the selected quotation, or the quotations code by a selected code. In the Memo Manager, the memo content is shown.
If you select an item, its details are shown in the inspector. You can rename each item, write, review or edit a comment and see other information like group memberships or links to other entities.
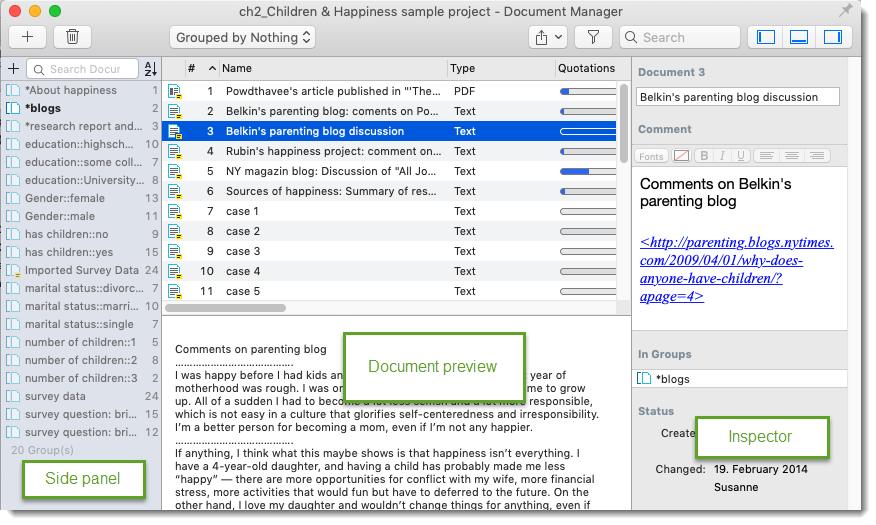
Figure 2.6 Document Manager
Another common element is the side panel on the left-hand side, which can be used to quickly access and filter the elements listed in the managers via groups, or codes in the quotation manager.
- Open the Code Manager: sort the entries with a click on the column header.
- Adjust the width of the columns as fitting.
- Grab the splitter between the list of codes and the preview pane and move it up and down.
- Select the code group ‘effects of parenting: positive’. The list of codes will be filtered, plus you see a beige coloured bar that shows which filter is currently active.
- To see all codes again, remove the filter by clicking on the minus (-) on the right-hand side of the beige box.
- Click on some other code groups. See how this facilitates the navigation of the code list and provides easy access to smaller groups of codes.
- In the Mac version you find a ‘grouped by’ option above the list items. An example is shown below. Try it out.
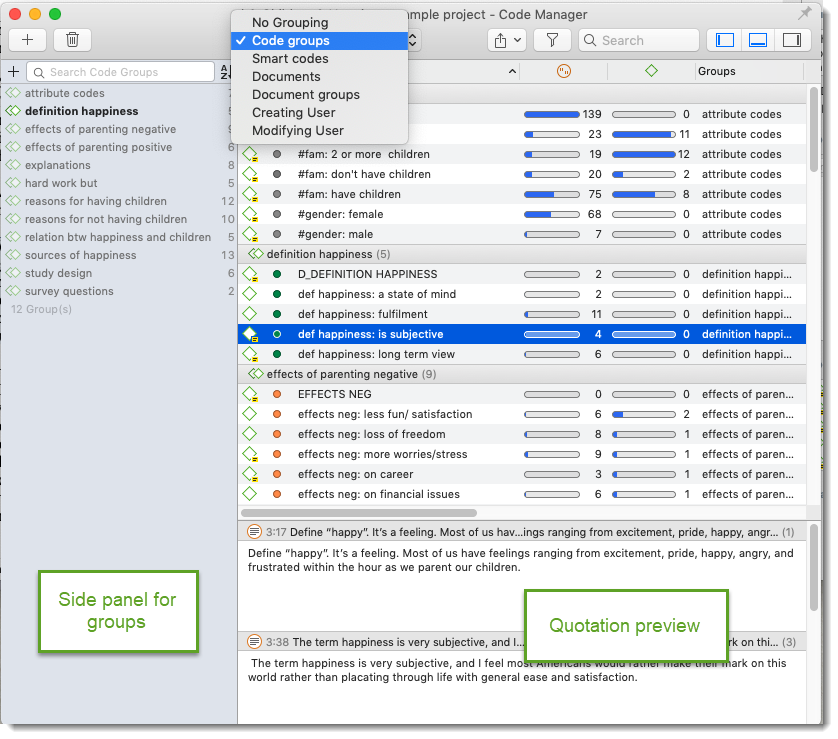
Figure 2.7 Grouped-by option in Code Manager
- To load a document, open the document tree in the Project Explorer on the left-hand side and double-click document D1 and D3.
The documents are loaded into two tabs in the main work space. The document name in the tab of the currently loaded document is coloured in blue. The document details are shown in the inspector.
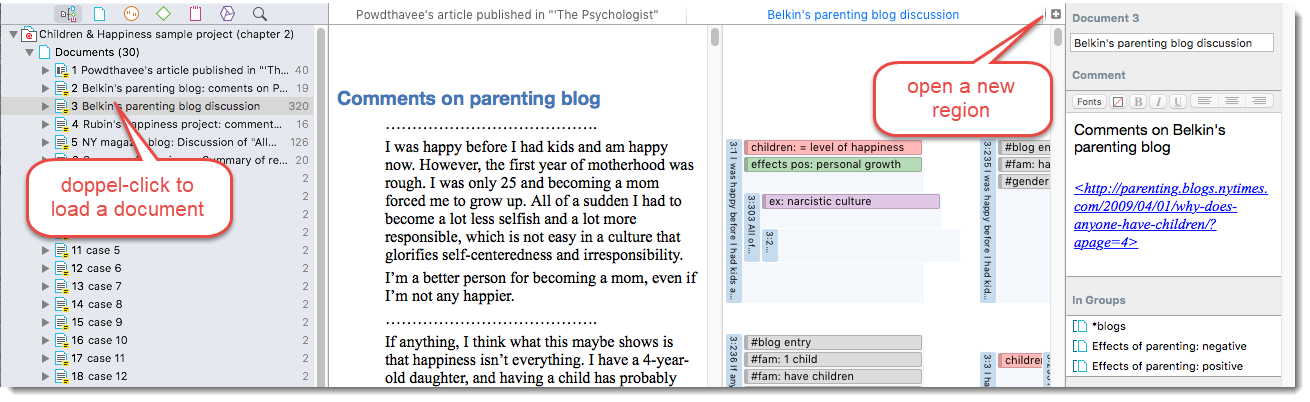
Figure 2.8 Loading documents
Note: In the Mac version, documents, memos and networks are opened in tabs. You can undock a window by clicking on the header bar and dragging the window to the side or to a different screen like you can do in other Mac applications. In ATLAS.ti, you will not find a specific dock / float option as in the Windows version.
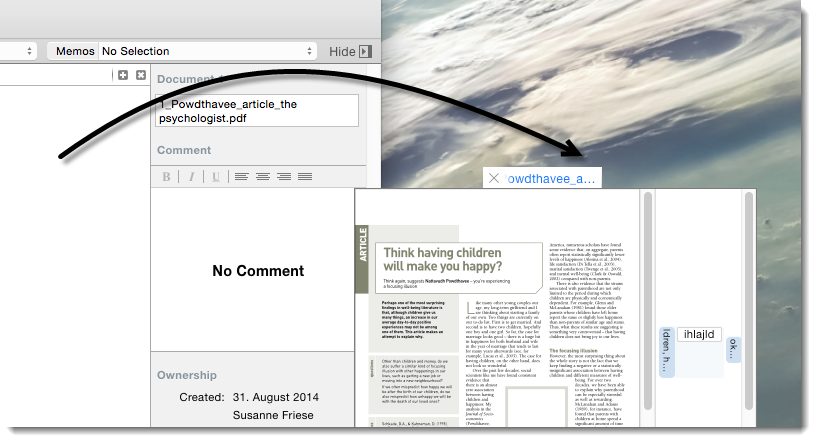
Figure 2.9 Opening multiple windows
All managers by default open as floating windows. You cannot dock them.
You can load multiple documents side-by-side or split your screen horizontally, or both.
- Click on the plus sign to add a new region (see Figure 2.8).
- Grab the document tab and drag-and-drop it into the new region.
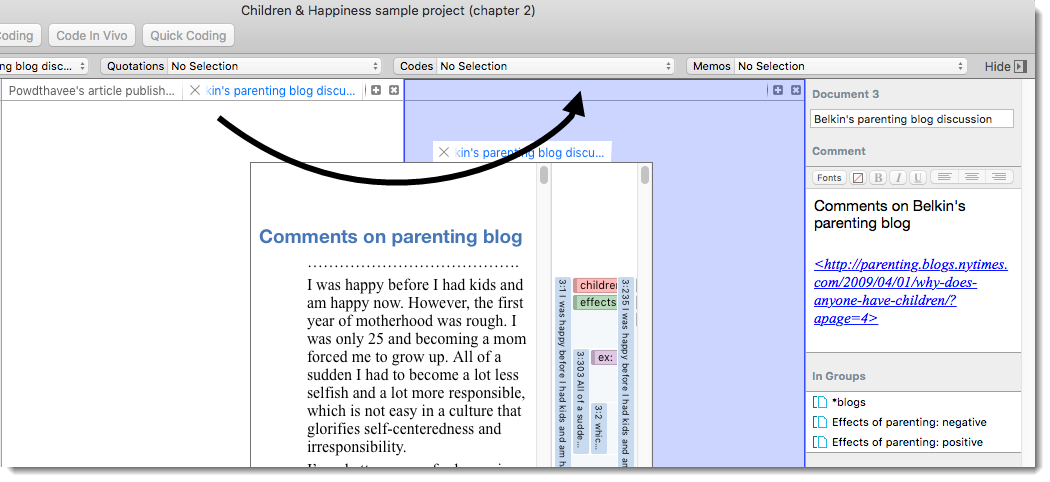
Figure 2.10 Opening documents side-by-side
There is no need to open a new region first. You can just grab a tab and drag-and-drop it either to the right- or left-hand side of the main window, or to the bottom of the main window. A new region is then opened automatically.
You can also open a document and a network or a document and a memo side-by-side, or two documents side-by-side and a memo horizontally above or below.
In this exercise I want to give you an idea of the benefits of coding.
- In order not to be distracted by too many open windows on your screen, close all windows by clicking on the X at the top left-hand side.
- Open the Code Manager.
- Type ‘reason’ into the search field to filter the list of codes.
- Select the code ‘reasons for hc: altruism’ (by the way: hc stands for ‘having children’). You can read the list of quotations below in the preview area.
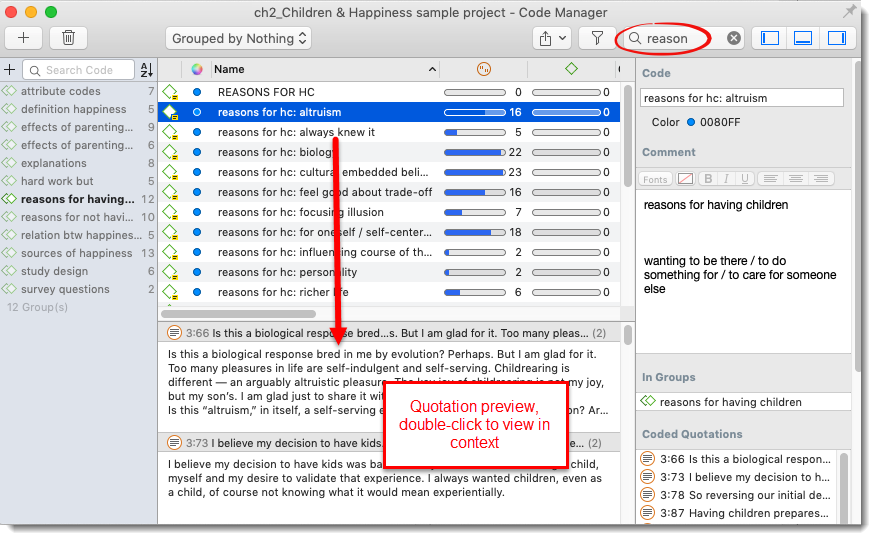
Figure 2.11 Simple retrieval of coded segments in the Code Manager
- If you click on a quotation, you can read the coded segment in the context of the document.
Another way to retrieve the quotations of a code is to double-click on a code in the Code Manager or the Project Explorer. This opens the list of quotations in preview mode. If you click on the drop-down arrow of the ‘burger’ menu, you can export the quotations as table or report.
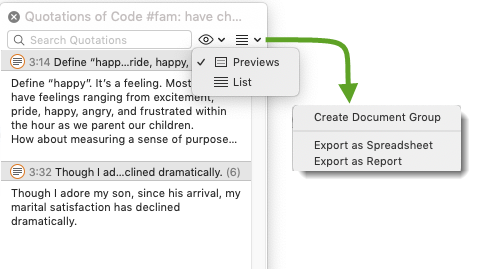
Figure 2.12 Simple retrieval of coded segments by double-clicking in a code
Open the Network branch in the Project Explorer and select the network ‘sample network’.
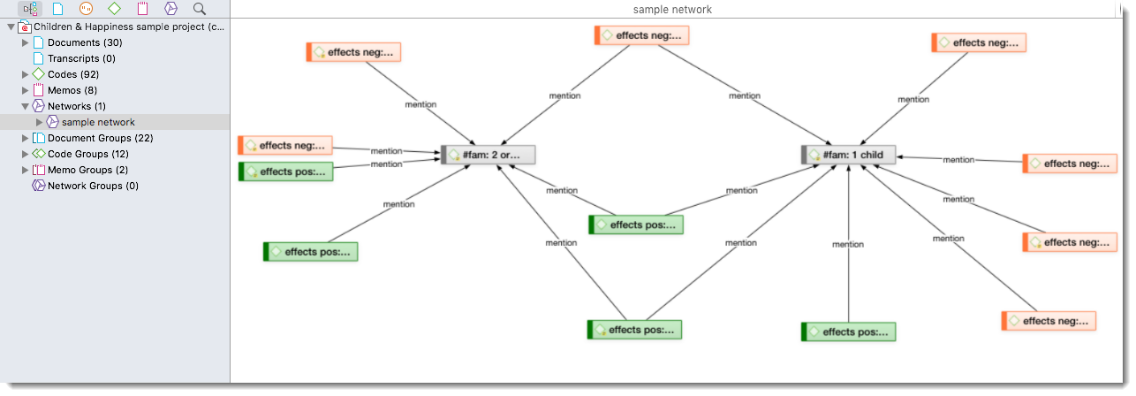
Figure 2.13 Sample network
- If the network does not fit on the screen, you can resize is using the two finger gesture on your mouse pad.
- Grab a node and move it to a different position.
- Right-click on a link (mention) and flip the link, chose a different relation, or unlink the two codes.
- Select the LAYOUT button in tool bar and try out the grid and the circular layout.
- Under VIEW, the only available option is to show the code comments, as this network only has codes in it. Try it out.
In the Mac version you can query the data in the Quotation Manager and the Query Tool. The Quotation Manager offers more options than the Query Tool. But as it is less obvious that it is possible to build queries in the Quotation Manager, the equivalent to the Windows Query Tool was introduced in version 8.4. For this skills training let’s look at the simpler Query Tool. You will learn more on building queries with the Quotation Manager in Chapter 6.
- From the main menu select Analysis / Query Tool.
If you open the Query Tool, a first rule is added automatically ‘is coded with’ / ‘code’ / ‘first code in your code list’:
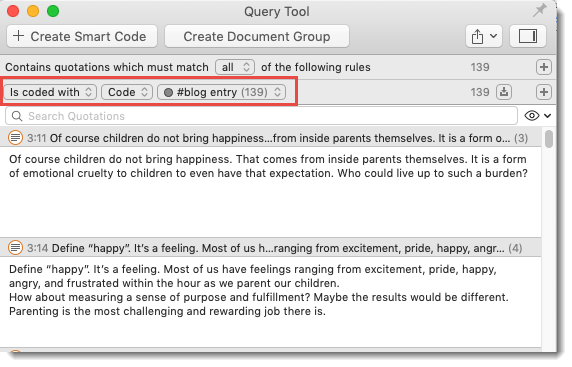
Figure 2.14 Start window when opening the Query Tool
- The rule in the top line is ALL. Leave it as is.
- Click on the button ‘is coded with’ and select the OR operator (OR: any of the following are true). Adding a new rule
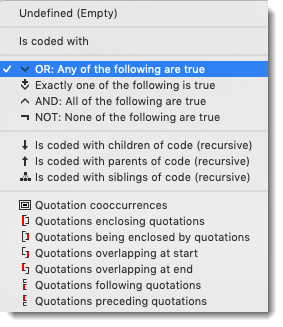
Figure 2.15 Building an OR query – list of available operators
- Two new lines are added automatically. In the third field, enter the code ‘def happiness: fulfilment’ in row one, and the code ‘def happiness: long term view’ in row two.
This query results in a total of 15 quotations that are listed below the query. You can either review them in context by double-clicking on each quotation, or by creating a report.
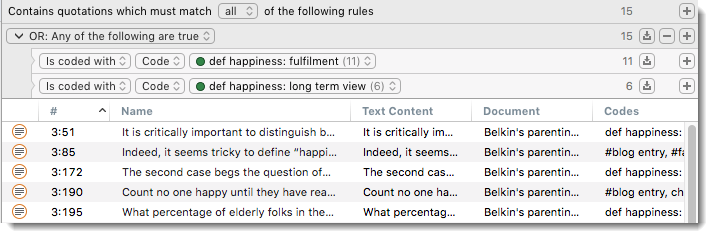
Figure 2.16 Building an OR query
- To remove a rule, click on the minus (-) button.
A more complex query looks like this:
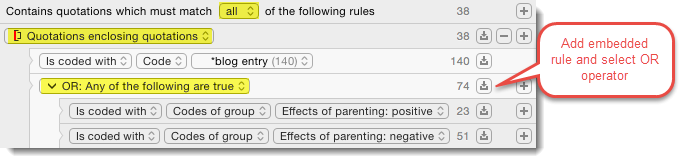
Figure 2.17 Example of a complex query
You will learn more about building queries in Chapter 6.