Mac instructions
These instructions are from Qualitative Data Analysis with ATLAS.ti (Third Edition), Chapter 4: Technical Aspects of Coding, copyright © Susanne Friese 2019.
These instructions are for version 8.3 of ATLAS.ti with the MacOS operating system.
For the exercises in Skills training 4.1 to 4.8 you will work with a few test codes that you will simply label test 1, test 2, test 3, test 4, A and B. Content does not matter at this point. The only exception is when I explain the use of in-vivo codes.
- Open your own project that you created while working through Chapter 3.
- Load for instance the document: ‘Parenting blog_reader comments’.
- Select a text segment with the mouse, right-click and select ADD CODING from the context menu.
- Enter a name and click ADD (see Figure 4.1).
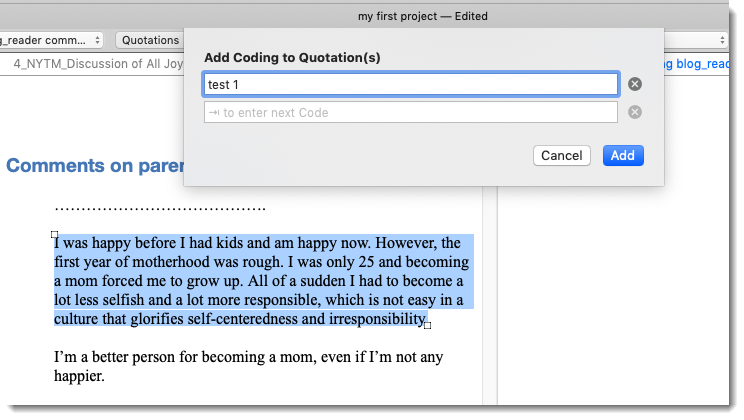
Figure 4.1 Coding a data segment with a new code
You have created your first quotation and code. Each is displayed both textually in the Project Explorer, the Quotation and Code Manager, and graphically in the margin area. A bar marks the size of the coded segment (= quotation) and the code name appears next to it.
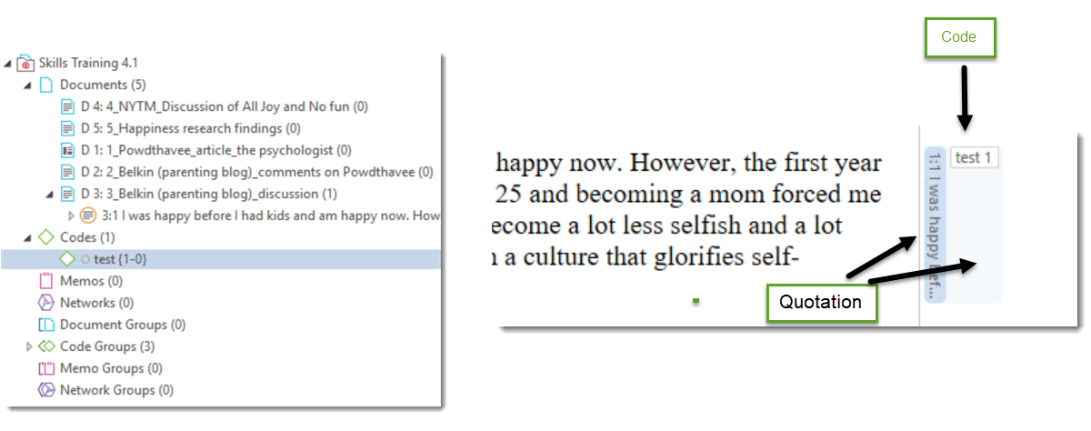
Figure 4.2 Display of codes and quotations in the margin area and the Project Explorer
Let’s code three more segments using this method:
- Highlight a different text segment, right-click, select the coding option from the context menu and enter ‘test 2’ as code name.
- Code two more segments using ‘test 3’ and ‘test 4’ as codes. Overlap some of your codings and observe what happens in the margin area.
Let’s code a new segment with the two codes A and B:
- Highlight a data segment. Right-click and select ADD CODING.
- Enter ‘A’ as code name. Press Enter. A quotation is created and coded with the code A.
- Enter ‘B’ as code name. Press Enter. The same quotation is now also coded with the code B.
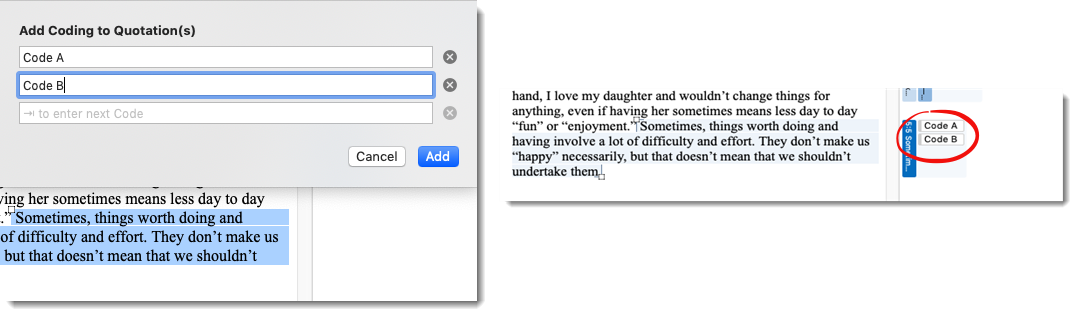
Figure 4.3 Coding with multiple codes
If your code lists get longer, you don’t always want to scroll to find the code you are looking for. Also, you want to be reminded which codes you already have. The coding dialogue also offers list coding. If you start typing, the list of codes will be immediately filtered and only show you codes that contain the letters you entered in the entry field:
- Highlight a data segment, right-click and select ADD CODING. Type the letter ‘t’. The list of codes shortens and only your test codes are displayed.
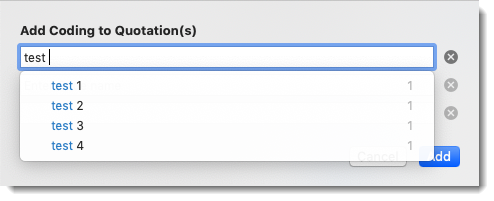
Figure 4.4 List coding
If you want to replace a code (perhaps because you have changed your mind, found a more fitting code, used a code by accident or want to develop subcategories) then the easiest way is to use drag and drop. This time, however, you cannot drop the code just anywhere; you must drop it exactly on top of the one that you want to replace.
- Let’s assume you want to replace the test 4 code in Figure 4.5 with test 2. Click on the ‘test 2’ code in the Code Manager or code list in the navigator, hold down the left mouse button, drag the code to the ‘test 4’ code in the margin area and drop it.
- A menu opens. Select the option REPLACE.
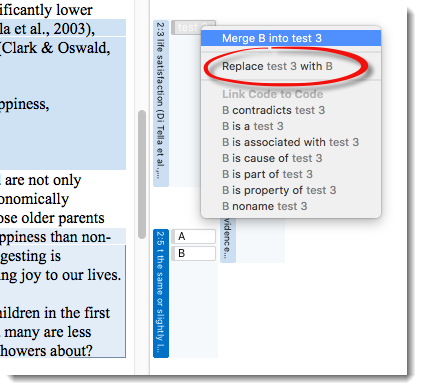
Figure 4.5 Replacing a code
- Select the quotation by clicking on the quotation bar or code in the margin area.
- If you move your mouse over the white box, the mouse pointer changes into a hand. Now you can move the little white box to the right, left, up or down. Note that the quotation bar in the margin also changes its size.
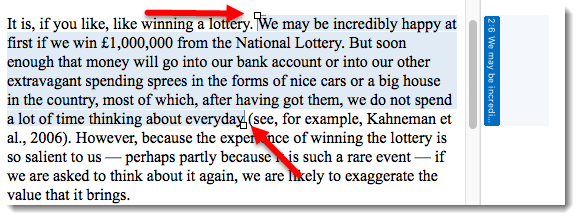
Figure 4.6 Resizing a quotation
This applies to all media types except geo quotations, as geo quotations have only one locator.
- To unlink a code, right-click on the code in the margin area and click on the option UNLINK.
When you unlink a code from a segment that only has one code, the bar for the quotation remains in the margin. If you want to ‘erase’ both the code and the quotation, you need to proceed as follows:
- Mark the coded segment to be removed (e.g. by clicking on the code in the margin).
- Move your pointer over the highlighted quotation, right-click and select DELETE QUOTATION from the context menu.
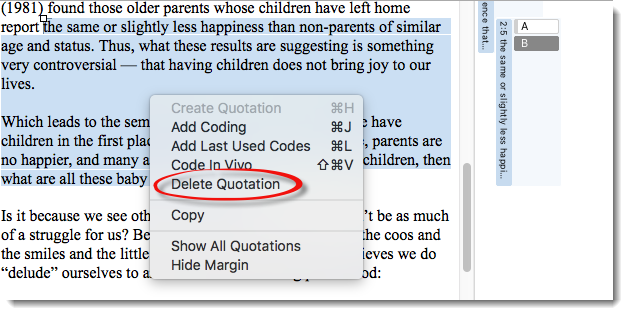
Figure 4.7 Deleting a quotation / removing a coded segment
- Right-click on the quotation bar in the margin area, select the option EDIT COMMENT from the context menu.
- An editor will pop up. Write a comment about the selected data segment. The comment is saved automatically.
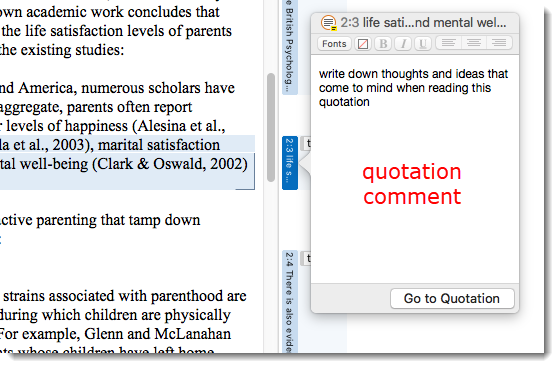
Figure 4.8 Writing quotation comments
- Mark a short text passage. Right-click and select the option Code In Vivo from the context menu.
Figure 4.10 shows an example based on the Children & Happiness project where some text segments are collected in the form of in-vivo codes. The ideas that I collected have to do with positive effects of parenthood.
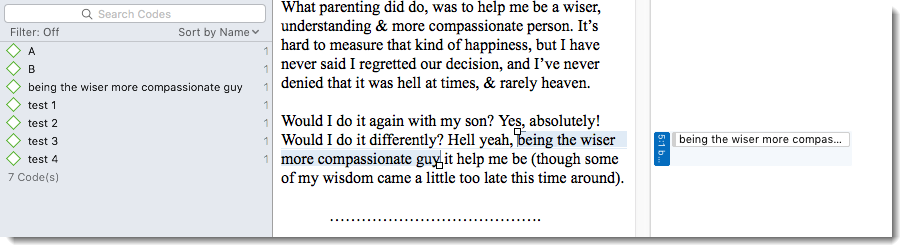
Figure 4.9 Coding in-vivo
Creating new codes
- Click on the plus (+) button at the left-hand side of the main window and select NEW CODE(S) or select CODE / NEW CODE(S) from the main menu.
- Enter a code name in the first entry field, click the tab key on your keyboard to move to the next line (‘➔❘’, enter a second code, click the tab key, enter a third code and so on.
- When you are done, click ADD.
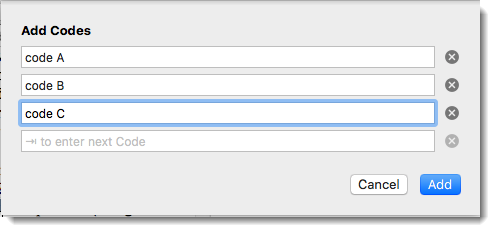
Figure 4.10 Adding new codes
Renaming codes
The renaming option is a global option. This means that renaming a code affects all coded segments that use this code.
- Select a code in the Code Manager, Project Explorer, the margin area, or the code list in navigator. The details of the code will be shown in the inspector and you can rename it there. Except in the margin area, you can also rename a code via the in-place method.
Adding a colour attribute to codes
- If you want to change the colour of one code, click on the white circle in front of the code name either in the Code Manager or the inspector. A window with a list of colours pops up. Select a colour.
- If you want to colour multiple codes at once, select the codes, right-click and select CHANGE COLOR from the context menu.
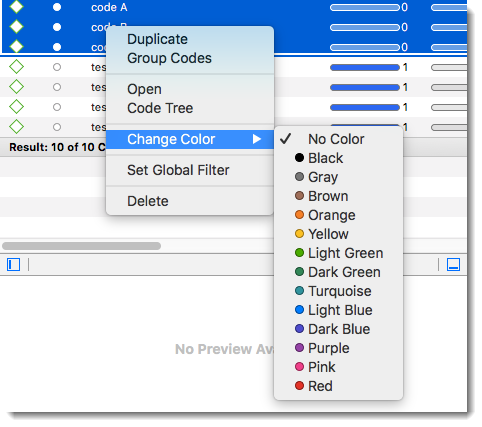
Figure 4.11 Adding code colours
The colour attribute is shown by a coloured circle in front of the code label. This colour is also used for code nodes in networks (see Chapter 8).
Deleting codes (and other entities)
- Select one or more codes in the Code Manager, right-click and select DELETE from the context menu.
Writing code definitions
You can write code comments in the inspector, or when double-clicking on a code in the margin area:
- Inspector: If you select a code, the information for this code is displayed in the inspector and you can write a comment into the comment field there.
- Margin area: Another option is to double-click on a code in the margin area. This opens a small window where you can write, review or edit a code comment. It is also possible to access all quotations that are coded with this code.
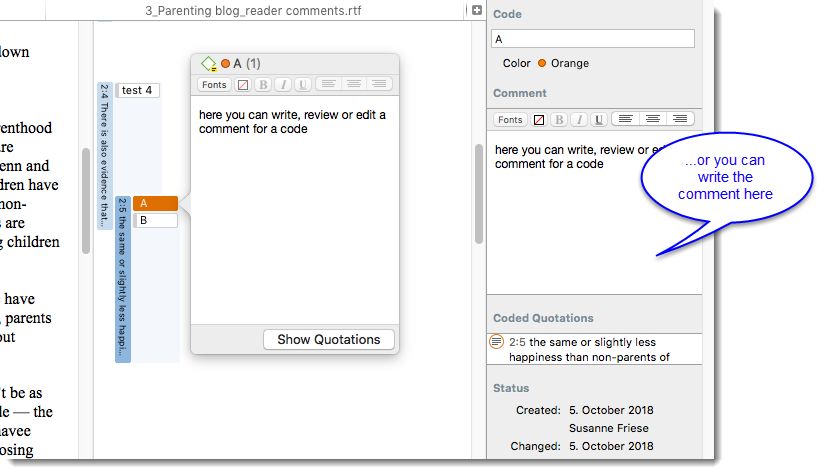
Figure 4.12 Writing comments for codes
Merging codes
- Open the Code Manager and select one or more codes that you want to merge with another code.
- Drag-and-drop the code(s) to the ‘target’ code that you want to keep. A window opens. Select the first available option: Merge code A into code B. The quotations are added to the target code, and the merged code is removed from the list of codes.
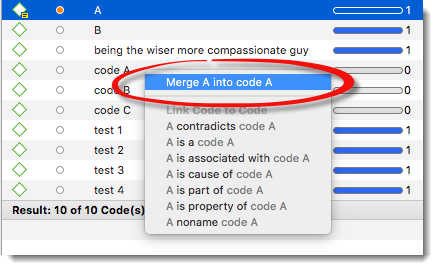
Figure 4.13 Merging codes
If the merged code has a comment, the comment is added to the target code. If both codes have a comment, an audit trail is provided.
This is how you need to prepare the Excel file for import in ATLAS.ti:
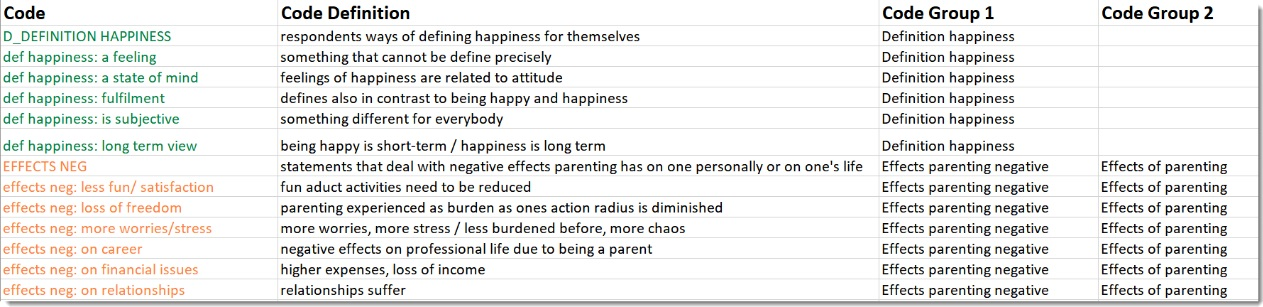
Figure 4.14 Preparing a code list for import in ATLAS.ti
You can enter headings like Code, Code Definition, Code Group 1, Code Group 2, but you do not have to. If you do not enter headings, the columns are interpreted in the following order:
column 1: code name
column 2: code description (comment)
column 3: code group
column 4: code group
all subsequent columns: further code groups
If you colour the code name, this colour is used in ATLAS.ti as code colour.
- To import the Excel file, select CODES / IMPORT/EXPORT / Import Codebook (XLSX) from the main menu. Depending on how you have set up your Excel file, activate or deactivate the option “Ignore header (first row) during import”.
You can either use your own data for the following exercise or download the focus group sample project from the online resources website and import it.
- Load the document and select CODE / FOCUS GROUP CODING from the main menu.
- Select a pattern for recognizing speaker units. If you use the sample project, select pattern 1 and click Continue.
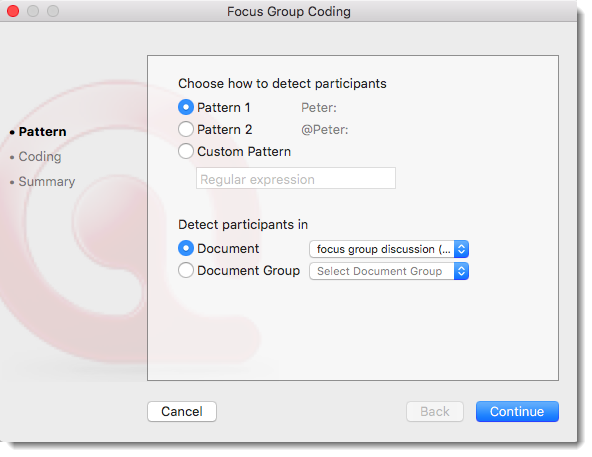
Figure 4.15 Select a pattern for recognizing speakers
ATLAS.ti lists all identifiers that fit the selected pattern and adds the name(s) as code. These might also include items that you would not classify as speakers but that fit the pattern.
- Select speakers.
You can also add more codes, for example, if you plan to compare the answers of male and female respondents or, as in the example, the answers of teachers teaching different languages. All codes must be separated by a semicolon. Since the speaker codes are a different type of code, I use a special character like a @ as the first letter in the code name. In the code list these codes are at the top, because the list is sorted alphabetically. See Chapter 5 for more information on setting up a structured coding system.
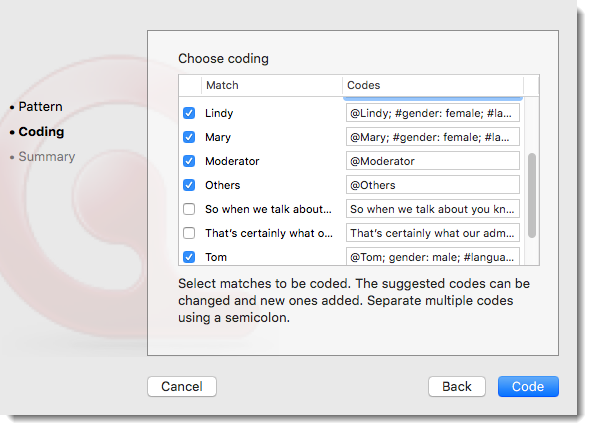
Figure 4.16 Select speakers and add codes
- Add more codes as needed and click on the button Code. When ATLAS.ti is done coding, a window pops up telling you how many codings have been created. A ‘coding’ is the link between a code and a quotation.
- Open the Code Manager to inspect the results. An example is shown in Figure 4.17
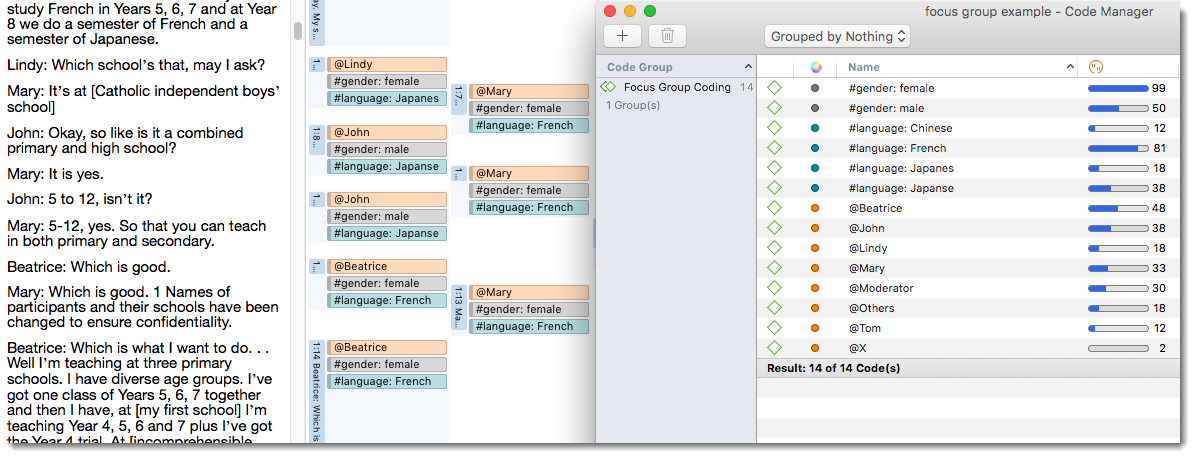
Figure 4.17 Data after coding
Display of video documents
- Import the sample project for skills training 4.15–4.17 from the online resources website or add a video file to your own project.
As the project contains larger video files, I suggest that you do not import the videos. Rather select the option Choose Folder and select a location where the video files should be stored.
- Next, load the video document.
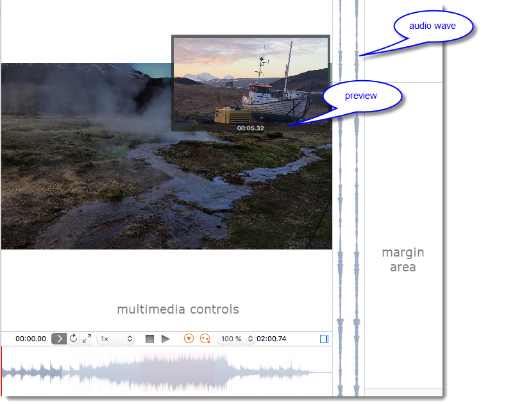
Figure 4.18 Display of a video document
- An easy way to start and stop the multimedia file is by pressing the space bar.
Zooming the timeline
You can zoom the timeline to select just the section of the audio or video that you want to see in the margin area:
- One way is to use the mouse wheel zoom by holding down the Shift-key. Another option is to use the two figure gesture on the mouse pad to zoom. Try out both options. The darker grey area in the horizontal audio wave shows you the area in the video that you zoom.
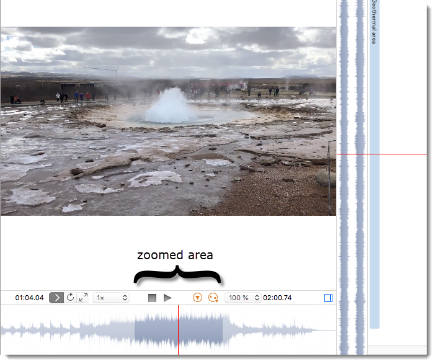
Figure 4.19 Zooming the timeline
Creating an audio or video quotation
- Move your mouse pointer over the audio waveform. You see the current video frame. Move the mouse slowly up and down and decide where you want the video quotation to start.
- Left-click and drag the mouse pointer to the position where you want the video segment to end.
- Let go of the mouse pointer. The video quotation is created automatically.
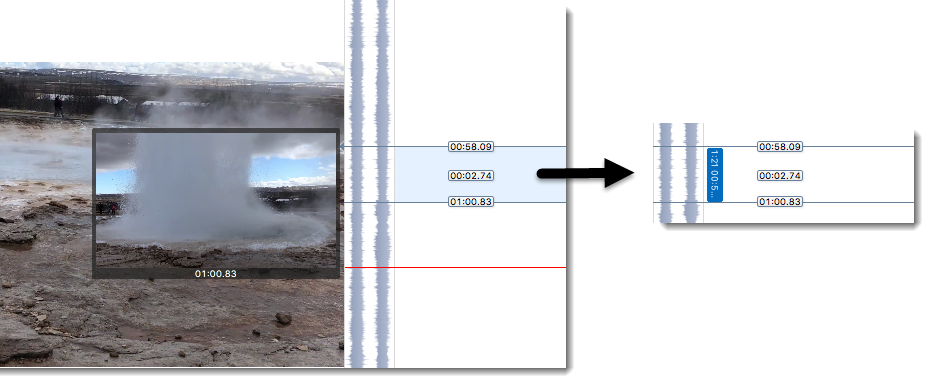
Figure 4.20 Creating a video quotation
- Start and end points can also be set via the keyboard. Click the spacebar to start the video. Press the comma key (,) to set the start position and press the dot key (.) to set the end point.
- To review a quotation: Hold down the cmd key and double click.
- If necessary, adjust the start and end positions by cropping the top or bottom line, and move it up or down.
Display of video quotations
The default name for image, audio and video quotations is the document name. You can, however, rename each quotation. Below, a step-by-step instruction is provided. All icons of commented quotations show a little sticky note (see Figure 4.21). In version 2 of the sample project, several quotations also have been linked to other quotations. Such links are called ‘hyperlinks’ in ATLAS.ti. You can see this in the inspector in the section ‘Linked Quotations’. See Skills training 7.5 for further detail on working with hyperlinks.
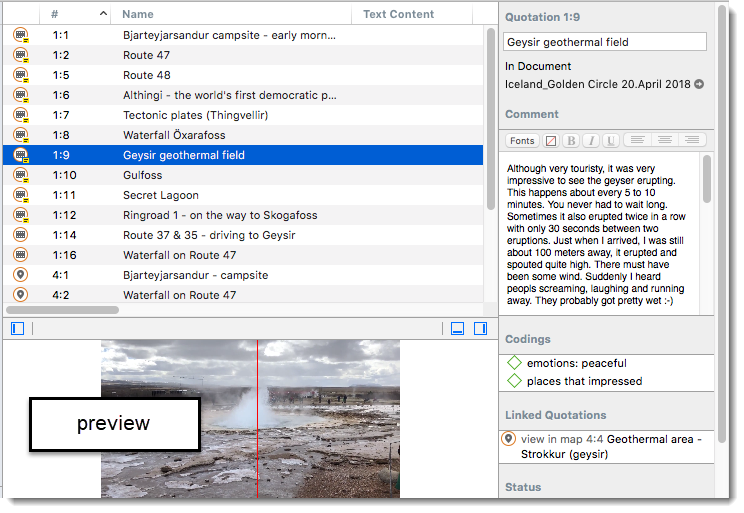
Figure 4.21 Renamed and commented video quotation in the Quotation Manager
Making use of quotation names and comments
- Option A: after creating a video quotation, rename it in the inspector.
- Option B: open the Quotation Manager, view each quotation in the preview area and rename it in the inspector. In-place rename is also available.
There is no character limit. I suggest using the name as the title that summarizes the video quotation. Longer descriptions and interpretations can be written in the commentary of the quote:
- Option A: Hold down the alt-key and double-click on a video quotation bar in the margin area (or right-click and select EDIT COMMENT).
- Option B: write a comment in the inspector.
A quick way to access all commented quotations is by setting a filter in the Quotation Manager.
- Open the Quotation Manager and click on the filter icon.
- Click on the plus (+) button.
- Create a simple query: click on the button that says ‘is coded with’ – a long list of option opens. Select HAS COMMENT.
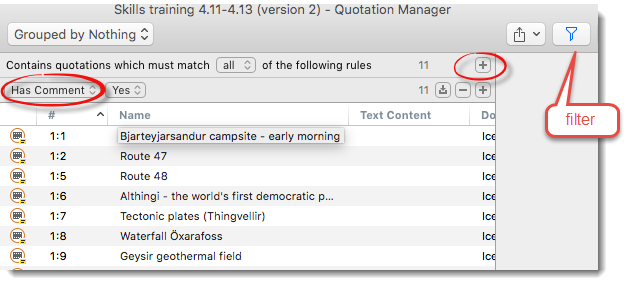
Figure 4.22 Filter quotations with comments
While adding titles for each video segment and writing comments, you begin the analytic interpretive process. An additional benefit is that you can create meaningful text reports. Below, you see a report of video quotations coded with the code ‘places that impressed’. If you want to create the report yourself, import version 2 of the sample project.
- Open the Code Manager and select the code ‘places that impressed’.
- Click on the Report button (see Figure 4.23)
- Select the options shown in Figure 4.23: Quotations, Comments and Hyperlinks.
- In the preview you see how your report will look. If you add quotation content, the first frame of the video segment is included.
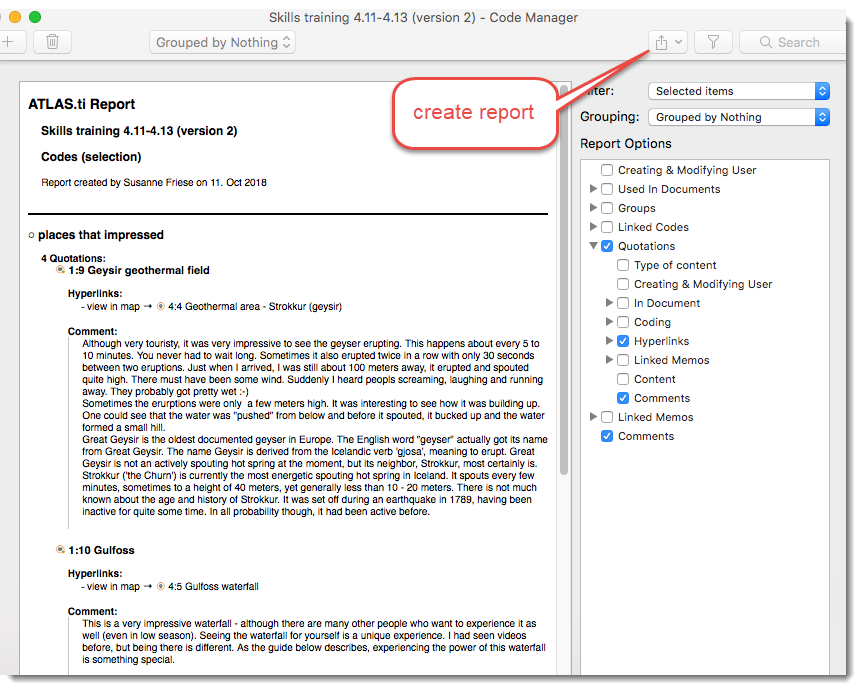
Figure 4.23 Creating a report for video quotations by code
Adding codes
Coding video quotation is no different from coding other media types:
- Right-click on the highlighted quotation segment (or the quotation bar) and select ADD CODING; or drag and drop an existing code from the navigation area on the left or from the Code Manager onto the quotation.
You can either add an image file to the project, or create a snapshot of an image in the video file:
- To create a snapshot, move the playhead to the position that you want to capture and click on the button CREATE SNAPSHOT DOCUMENT in the tool bar.
The snapshot will be added as a new image document to your project.
- Load the new image document, select a rectangular area and go ahead to code it as described for text segments.
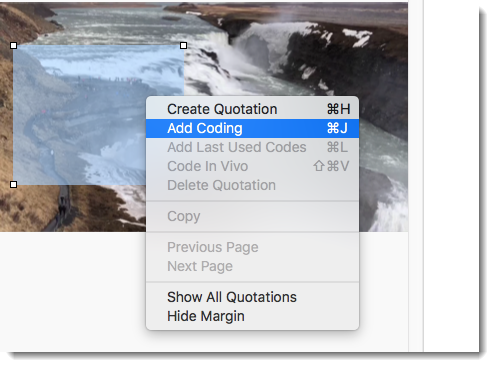
Figure 4.24 Coding an image document
Adding a geo document
- To add a geo document, select DOCUMENT / NEW GEO DOCUMENT from the main menu.
- The new document is loaded, and you see the world map. ATLAS.ti uses Open Street Map for this function. The default name for the document is ‘Geo Document’. You may want to rename it, so it better describes your analytic intention. If you work with the sample project, name it ‘Iceland’.
Let’s look for the place that I have captured above: enter ‘Gulfoss’ into the search field.
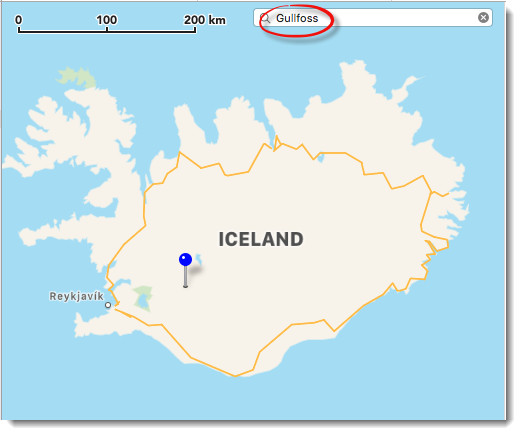
Figure 4.25 Looking up a geo location
The map immediately displays the location that fits the search term and adds a place mark. Zoom in to move closer to the place.
Creating a geo quotation
- In the tool bar, click on the button QUOTATION FROM SELECTION PIN.
- If you want to create a quotation for a different location on the map, left-click until you see a place mark and proceed as above (or right-click and select CREATE QUOTATION).
![]()
Figure 4.26 Creating a geo quotation
Geo quotations can be accessed in the margin area, the Quotation Manager, the Quotation Browser and Project Explorer in the navigation area on the left-hand side, and from within networks. In the Quotation Manager, geo quotations are displayed as follows:
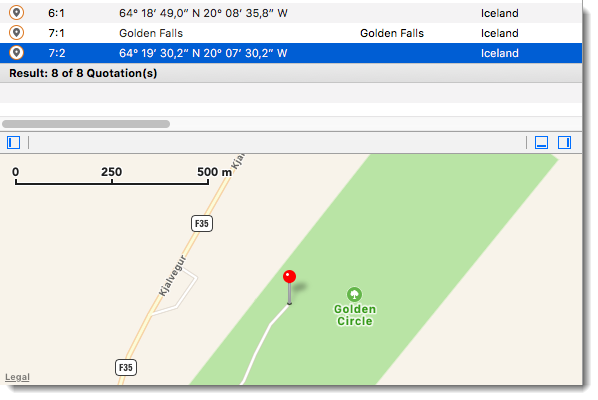
Figure 4.27 Display of geo quotations in the Quotation Manager
The quotation icon shows a place mark and the quotation name consists of either the place name if you searched for a location, or the geo coordinates for degree of longitude and degree of latitude according to the World Geodetic System 1984 (WGS84). In addition, the Quotation Manager shows a preview of the geo location. Similar to working with video data, it is useful to rename and comment geo quotations.
- Change the name of this quotation to something more meaningful, like the place you have marked. Write something in the comment field to describe the location (e.g. excerpts from your field notes or information you have about the location).
- Create a few more geo quotations, rename and comment them. See version 2 of the sample project.
Coding geo quotations
- Right-click on a geo quotation either in the margin area, the Quotation Manager or the Project Explorer and select the option ADD CODING.