Mac instructions
These instructions are from Qualitative Data Analysis with ATLAS.ti (Third Edition), Chapter 3: Embarking on the Journey: Data and Project Management, copyright © Susanne Friese 2019.
These instructions are for version 8.3 of ATLAS.ti with the MacOS operating system.
Embarking on the journey – data and project management
The workflow for setting up a project looks as follows:
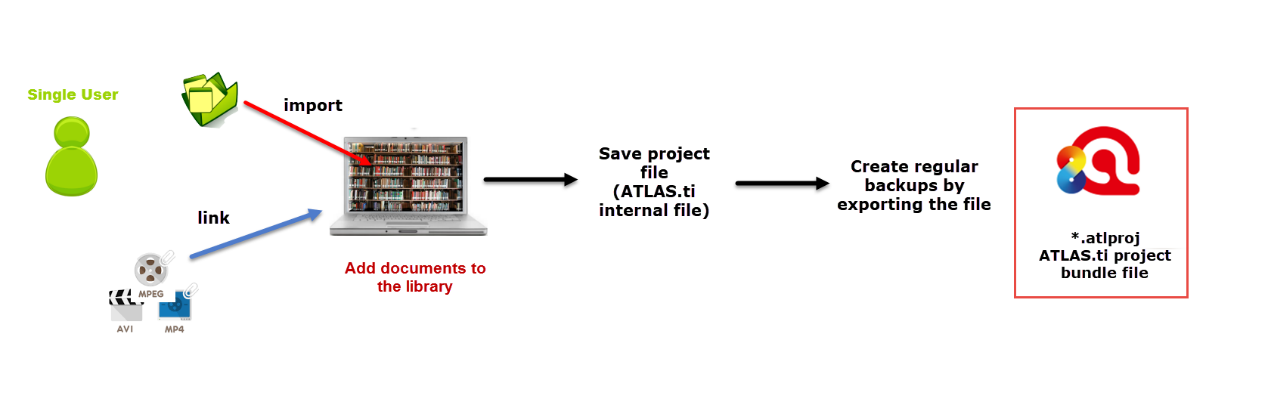
Figure 3.1 Workflow for setting up a single-user project
You can either use your own data or download the sample data from the online resources website to follow the skills training. I recommend that you practice with the sample data first before you apply what you learned to your own data.
- Download and unzip the sample data set. The name of the unzipped project folder is ‘Happiness sample data’.
Creating a new project
- Open ATLAS.ti and create a new project: If you just started ATLAS.ti, click Create a new ATLAS.ti project in the opening window. Enter a project name like ‘My first project’ and click on Create. If a project is already open, select PROJECT / NEW from the main menu.
Adding documents
- To add documents to a project, select DOCUMENTS / IMPORT DOCUMENTS from the main menu, or click on the drop-down arrow in the + button at the top left of the main window.
- Navigate to the folder where you saved the sample documents or your own document. Select all documents that you want to import and click open.
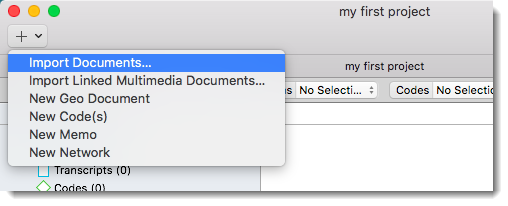
Figure 3.2 Adding documents to a project
You can also add entire folders, by dragging them from the Finder onto the Document branch of the Project Explorer.
As audio and video files can be quite sizable, you have the choice to link them to a project instead of adding them. This means they stay at their original location and are accessed from there. Preferably, these files should not be moved to a different location. If the files need to be moved, you need to re-link the files to your project. ATLAS.ti will alert you, if there is an issue and a file can no longer be accessed. You find a REPAIR LINK button in the Document Manager under the Utilities tab.
Commenting your data and keeping track of analytic thoughts
- Open the Document Manager and select a document.
- All information about this document is shown in the inspector. Write a comment into the comment area. As you click on another document or outside the inspector the comment is saved.
Each document that has a comment shows a little yellow sticky note in the document icon.
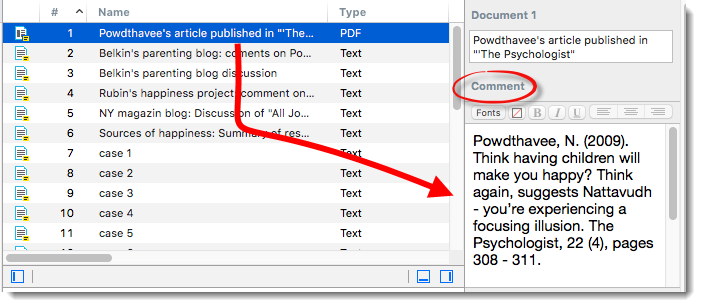
Figure 3.3 Commented documents in the Document Manager
Saving the project
- After you have added and commented your documents, save the project by selecting PROJECT/SAVE or use the short-cut CMD +S.
Creating groups in a manager
- Open the Document Manager, for instance with a double-click on the Document branch in the Project Explorer.
- Select some documents and drag-and-drop the selected documents into the side panel on the left. If you work with the sample data, select document D1 and D5. You can use common selections techniques holding down the cmd or shift key.
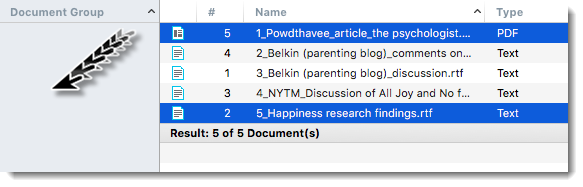
Figure 3.4 Creating a document group in the Document Manager
Change the default name, e.g. to ‘research articles’.
Create a second group for documents D2, D3 and D4 that you name ‘blog data’.
The document groups can be used to easily access sub sets of your data.
- Click on the group ‘blog’ in the side panel. As a result, only the three documents of this group are displayed in the Document Manager. Above the list you will see a pale-yellow bar indicating that a filter has been set and which one. This filter is local and only affects the current window, here: the document manager.
In Chapter 6 you will learn about global filters. Global filters affect the entire project and can be used for analytical purposes. For now, I want you to remember that every time you see that pale yellow bar over a list, you've set a local filter.
- To remove the filter, click on the minus (-) on the left-hand side.
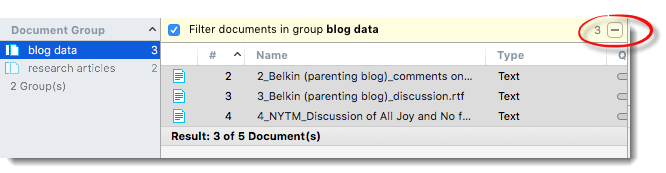
Figure 3.5 Setting a document group as local filter
Conversely, one can see in which group a document is.
- If you select a document that is part of a group, the group name is highlighted. In the figure below for example, you can see that the document ‘case 4’ is male, has a highschool education, has children, and is part of the group ‘Effects of parenting: negative’.
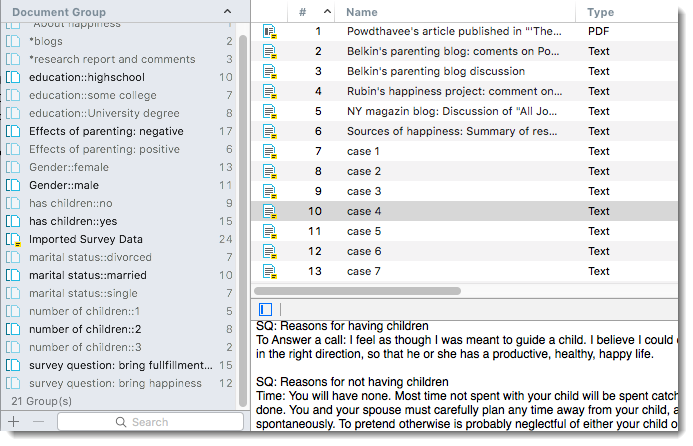
Figure 3.6 Display of group membership
If you want to remove items from a group in a manager, proceed as follows:
- Select a group in the side panel.
- Right-click one or more items that you want to remove from this group and select REMOVE FROM GROUP.
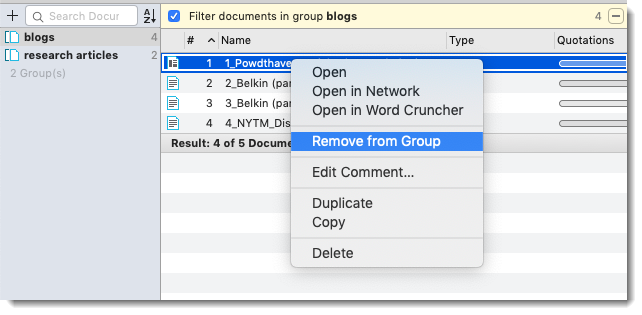
Figure 3.7 Remove an item from a group
Creating groups in the group manager
Another way to create groups is in the group manager. I prefer to create groups in managers, but everyone develops their own preferences.
- To open a group manager, double-click on one of the main group branches in the Project Explorer, or select the option via the main menu, e.g. DOCUMENT / SHOW DOCUMENT GROUP MANAGER.
- In the Group Manager, click on the plus (+) button to add a new group.
- Change the default name.
- On the left-hand side you see the list of all items that can be added to the group. You can move single items into the group by double-clicking. Or select multiple items and use the left arrows to move them into the group. Vice versa, you can remove items from a group.
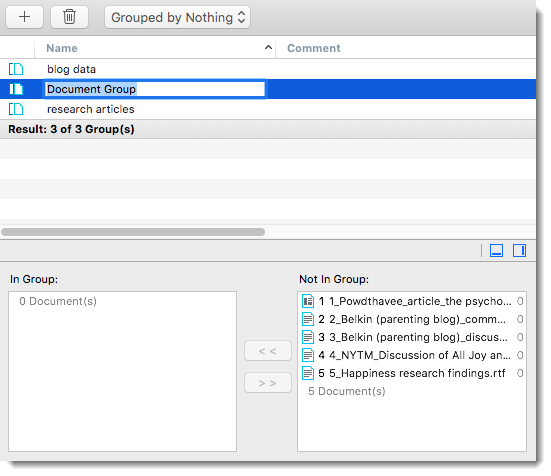
Figure 3.8 Creating a group in a group manager
Deleting a group
- Select a group in the group manager and click on the DELETE button in the toolbar. In the side panel of a manager, select one or more groups, right-click and select DELETE from the context menu.
Renaming a group
- You can rename a group by right-clicking and selecting the RENAME option from the context menu, or use the in-place editing method.
- If you have loaded a current project, save and close it. You cannot change the library location when a project is currently open.
- Choose a location where you want to store your ATLAS.ti projects and create a new folder. Call it, for example, ‘ATLAS.ti library for my projects’.
- Select ATLAS.TI / SWITCH LIBRARY.
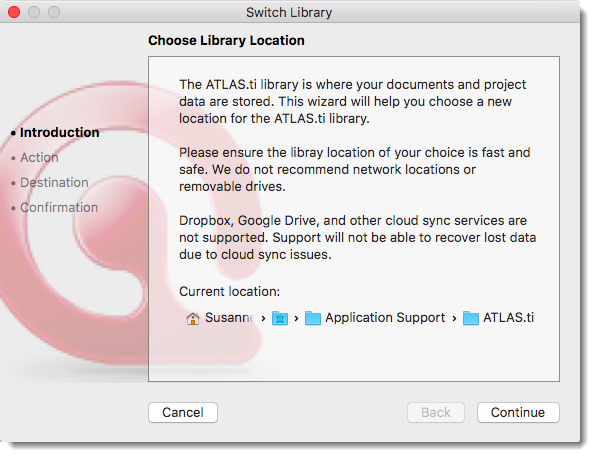
Figure 3.9 Switching library location
- Read the text and click CONTINUE.
- Select CREATE A NEW EMPTY LIBRARY.
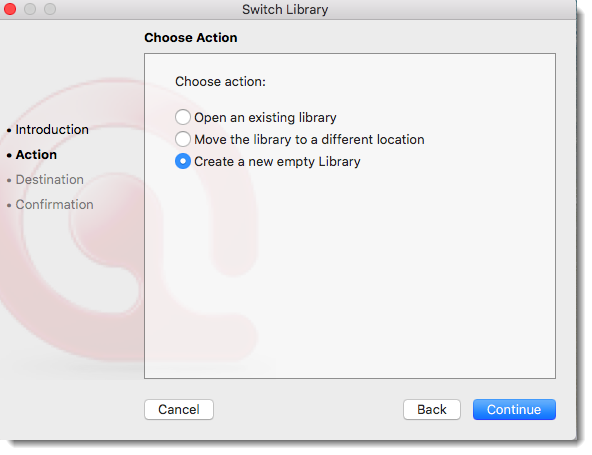
Figure 3.10 Create a new empty library
- Click CONTINUE.
- Select CHOOSE LIBRARY LOCATION and click on CHANGE LOCATION.
- Select the newly created folder as the new location for the library and click SAVE. The folder that you select needs to be empty. ATLAS.ti will create several sub folders within in. Don’t use this folder for any other purpose.
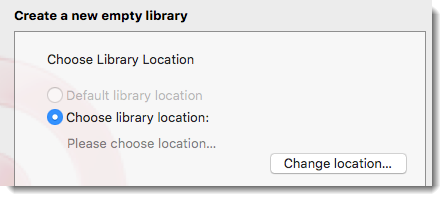
Figure 3.11 Choose a location for the new library
- You will return to the previous screen, now showing the new location. Click CONTINUE.
- Confirm the new location and click FINISH. Wait until ATLAS.ti returns to the opening screen. The opening screen will be empty, and you can begin to fill it with new projects.
To return to the default library which has the project that you created in Skills Training 3.1, again go through the above steps, but this time select the default library:
- Select ATLAS.TI / SWITCH LIBRARY.
- Click CONTINUE.
- As action, select OPEN AN EXISTING LIBRARY. Click CONTINUE.
- As destination, select DEFAULT LIBRARY LOCATION. Click CONTINUE.
- Confirm the switch and select FINISH.
To start importing the file into ATLAS.ti:
- Select the DOCUMENT / IMPORT REFERENCE MANAGER DATA.
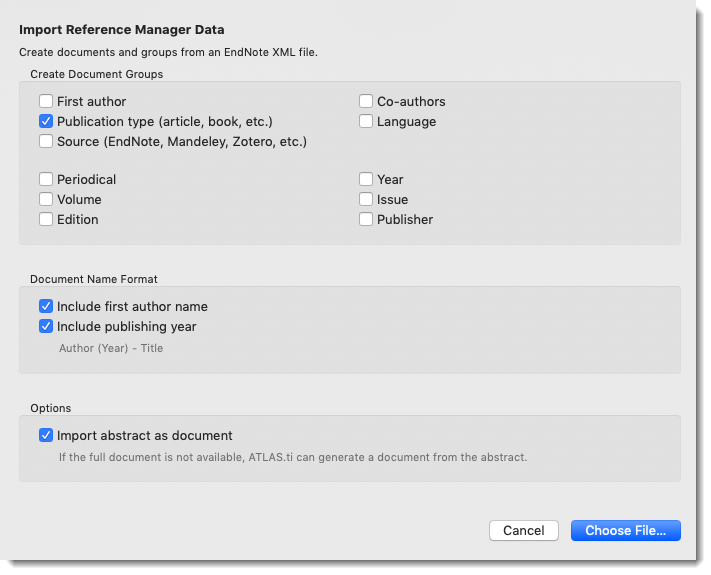
Figure 3.12 Import Reference Manager Data
By default, ATLAS.ti only creates a document group for type of document (journal article, book, book chapter, etc.). Further grouping options are first author, co-author, source, periodical, year, volume, issue, edition or publisher. Select only those options that are relevant for retrieval and comparison purposes. If you do not have multiple documents per edition, issue or volume, there is no need to create a group for each of them. If you import documents from more than one reference manager, it is useful to group documents by source, so that you know where they came from.
As document names ATLAS.ti uses the name that is stored in the Reference Manager. For easier sorting and organization, it is beneficial to add the name of the first author and the publishing year to the document name when importing.
If only the document abstract is available and not the full document, you can select to import the abstract as a document.
- Make your selections and select Choose File.
- Select the XML file that you exported from your Reference Manager (or the sample data provided in the online resources). Note that there is a folder with the PDF files of your articles in the same folder as the XML file. If you prepare data from Endnote, your collection also needs to be stored in the same folder as the XML file.
- To inspect the imported documents, open the Document Manager.
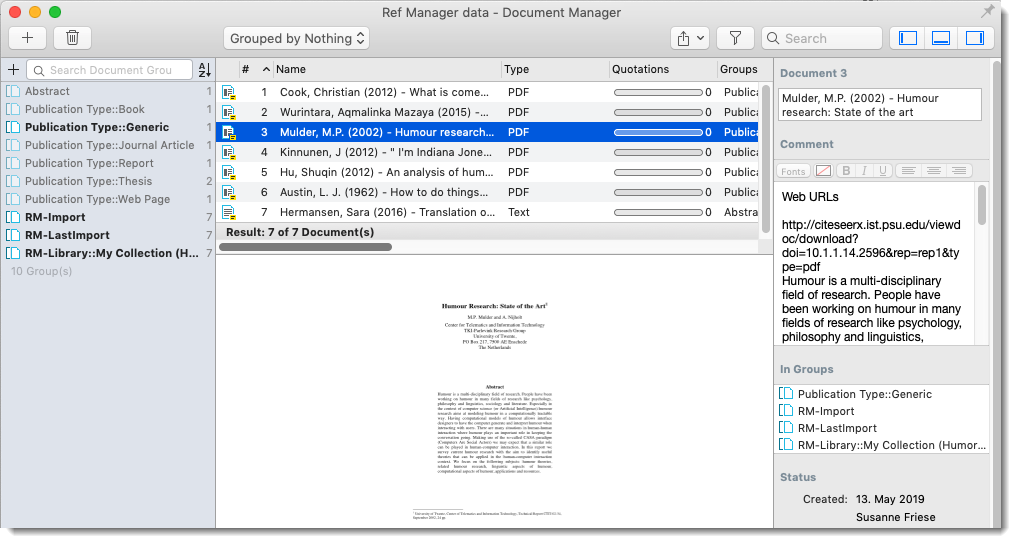
Figure 3.13 Document Manager after importing Reference Manager data
The imported documents are sorted by author and year in alphabetical order. Further, document groups were created based on the available information. Document 3, for instance, was published in Technical Report CTIT-02-34 in 2002, which has been classified as Publication type: generic. The text entered as note in Mendeley was imported as comment. If there are no notes for the document, the URL of the document is added into the comment field (if available).
Creating a memo
Let’s create a research diary. This is a ‘free’ memo, which means it is not connected to anything else the project. In later chapters, you will see that memos can also be linked to codes, quotations and other memos.
- Click on the drop-down arrow of the plus (+) button at the top left in the main menu and select NEW MEMO. The new memo will open in a new tab.
- In the inspector, change the default name to: Research diary.
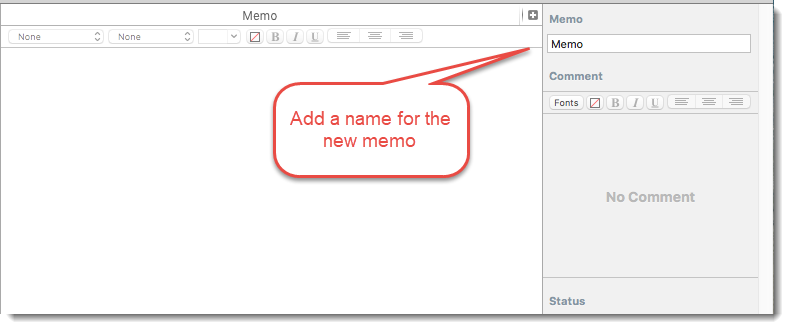
Figure 3.14 Creating a new memo
This is what you can write into a research diary:
- Describe what you have done today (in terms of the work on your ATLAS.ti project).
- Write about the insights you gained.
- Notes about discussions and useful conversations.
- Questions that you might want to explore.
- Suggestions about reading, contacts, ways forward on problems.
- Brainstorming notes or diagrams.
- Reflections on the research process.
If you open the Memo Manager, you will see that the text you have written into the Memo Editor also shows up in the lower part of the Memo Manager. You can continue to write the memo there, but it is less practical, and you have fewer editing options.
- To open the Memo Manager, click on the MEMOS button in the tool bar, or double-click on the Memos branch in the Project Explorer.
- If you select the memo ‘research diary’, you see the content in the text pane below.
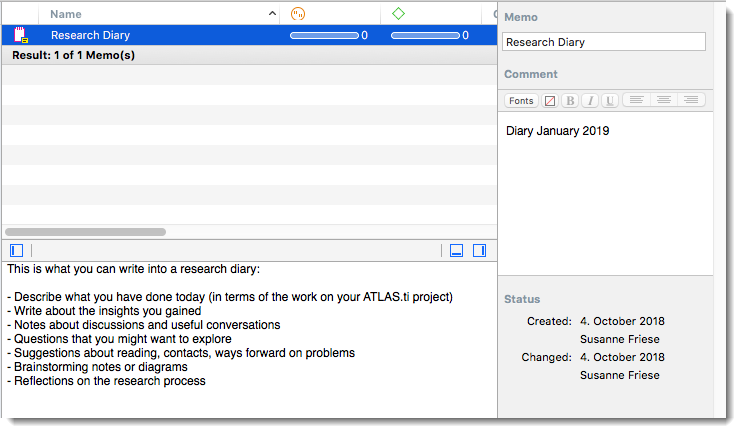
Figure 3.15 The Memo Manager
You can write a comment for each memo. These could be a description for your research diary, notes to yourself like ‘use this memo in Chapter 5’, ‘look up the article by Smith (2012)’; or a supervisor could comment at some of your analytic memos, or team members can comment on each other’s writings, and so on.
- To create reports, select MEMO / OUTPUT from them main menu.
- To turn a memo into a document, select MEMO / CONVERT MEMO to Document from the main menu.
At the time of writing, word clouds were not yet available in the Mac version. Instead you can explore your data creating word lists. Word lists can be created for selected documents, codes and quotations.
- If not still open, open the project with the survey data that you have created in Skills training 3.7.
- Select ANALYSIS / WORD CRUNCHER.
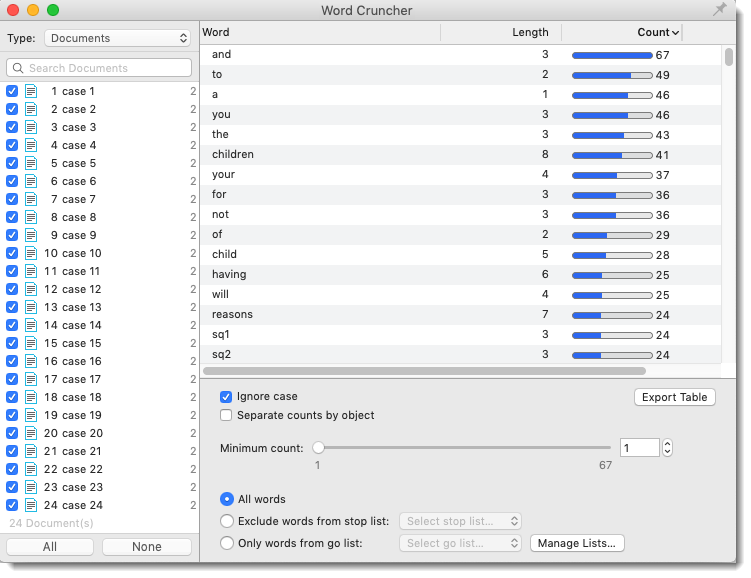
Figure 3.16 Word Cruncher
- Select ALL and sort the results by count.
Words like ‘and’, ‘you’ and ‘to’ come up as very frequent. To make the word list more meaningful, it is useful to work with stop-word lists. This means all words that are in the list will not be counted. ATLAS.ti offers four stop-word lists: one for English, Spanish, German and French language data. If you need other languages, look at the following website: https://www.ranks.nl/stopwords, or use other online sources.
- To apply a stop-word list to your data, select the EXCLUDE WORDS FROM STOP LIST option (see the options at the bottom of the window) and select the English stop list from the drop-down menu.
The word list will change. You may want to do some further clean-up by excluding the words from the survey question like ‘sq’, ‘sq1’ ‘reason’ and ‘children’ / ‘child’. It is obvious from the question that it is about children. Therefore, it does not need to be included in the list.
- To exclude individual words, right-click on a word and select ADD TO STOP LIST.
If you want to import stop lists or create new ones, click on the MANAGE LISTS button. This opens the Stop and Go Lists Manager.
If you want to compare words of respondents from members of different document groups, you can work with global filters:
- Pin the Word Cruncher to the screen so that it always stays on top by clicking on the pin icon at the top right of the Word Cruncher Window. It will turn blue.
- Open the Document Group branch in the Project Explorer.
- Right-click on the document group ‘Gender::female’ and select the option SET GLOBAL FILTER. You will see the global filter setting at the top of the Project Explorer. A document filter filters documents and quotations. Hence, you see the 2 coloured bars: the blue one indicating the document filter, the orange one indicating the quotation filter.
- The list of documents in the Word Cruncher now only shows the documents of female respondents. Select ALL and look at the list of most frequent words.
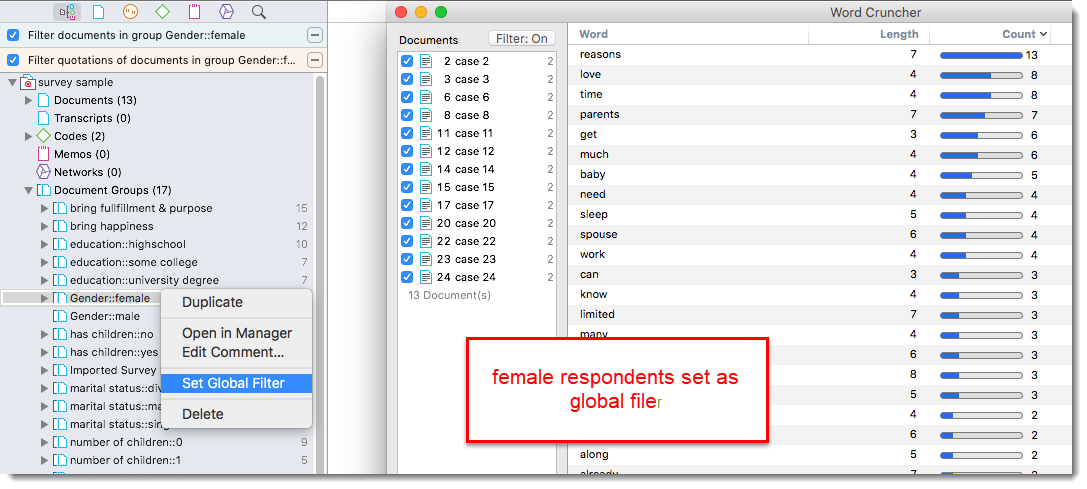
Figure 3.17 Word Cruncher with global filter setting
- Change the global filter to ‘Gender::male’ and inspect the list of words.
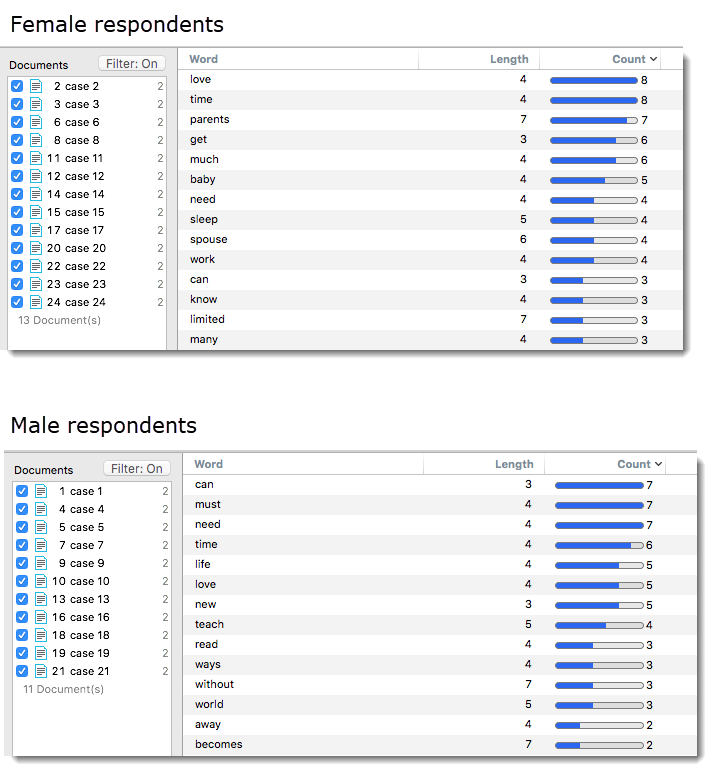
Figure 3.18 Comparing words by group of respondents
As the two questions and their answers – ‘Reasons for having children’ and ‘Reasons for not having children’ – were coded when importing the data, we can further explore possible differences in the responses by men and women by creating a word list for each question.
Open the Code Manager, select the code ‘SQ1’ in the main list, right-click and select OPEN IN WORD CRUNCHER.
Repeat this for ‘SQ2’ and move the second word list next to word list for SQ1, so you can see both side by side.

Figure 3.19 Comparing words used in the responses to survey questions 1 and 2
In the answers to the question 'Reasons to have children', you will see many more positive words compared to the answers to the question 'Reasons not to have children'.
You can break it down further, by comparing men’s and women’s responses to both questions. The easiest way to do this is by setting a global filter for the two document groups ‘gender::male’ and ‘gender::female’.
- Right-click on the document group ‘gender::female’ in the Project Explorer and select SET GLOBAL FILTER.
- After inspecting the results, change the global filter to ‘gender::male’.
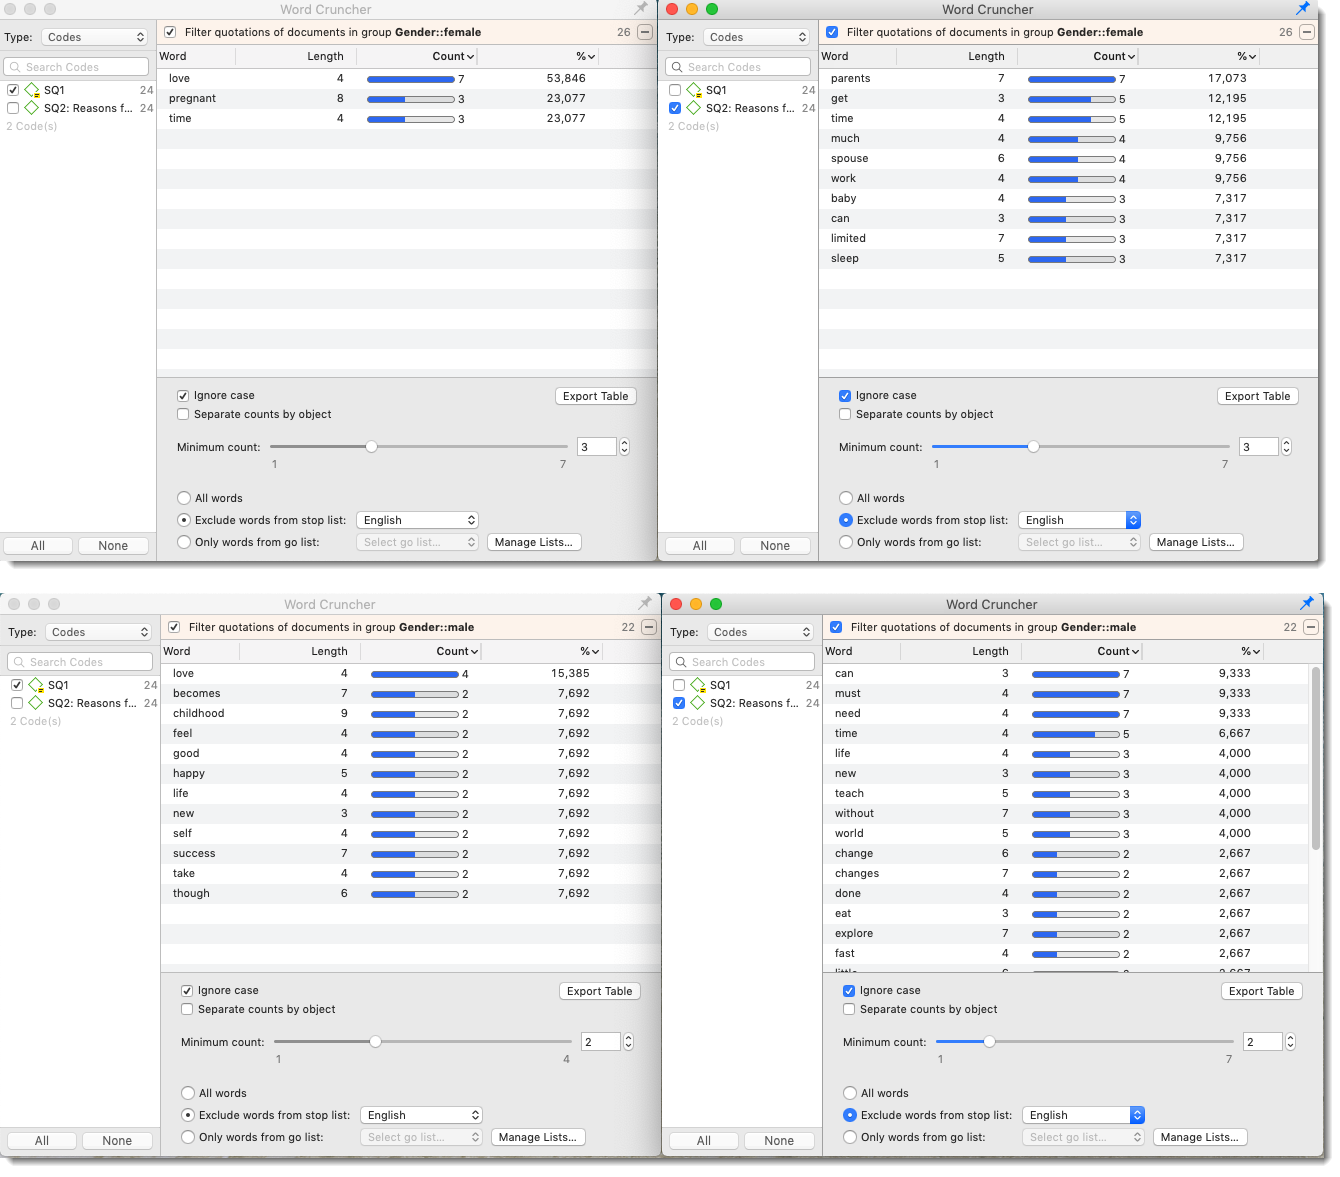
Figure 3.20 Comparing answers to the two survey questions by gender
The global filter setting is indicated by a colored bar above each affected list. In the Project Explorer documents and quotations are filtered; in the Document Manager the list of documents. This means all subsequent analysis is only done on the documents of the filtered group. All other documents are hidden. You will learn more about global filter settings in Chapter 6.
Figure 3.18 shows all four word lists in one image for ease of comparison. For most projects the word lists are not a final result, but they can be a starting point. They can give ideas for coding, or you can use the auto coding function (not covered in this book) based on the words you see in the word lists.
If you want to read more context around the words shown in a word list, you can use the project search.
- To do so, right-click on a word in the word list and select SEARCH. This will open the Project Search Tool.
It can also access the Project Search Tool in the Project Explorer:
- Select the SEARCH icon in the Project Explore.
- Enter for instance ‘must’ as search term. As you can see in Figure 3.18 the global filter is still set to ‘Gender::male’, Click on the SEARCH button to run the search.
- Double-click to show the search hit in the context of the document. If appropriate, you can now begin to code (manually or automated) the data. See Chapter 4 for further detail.
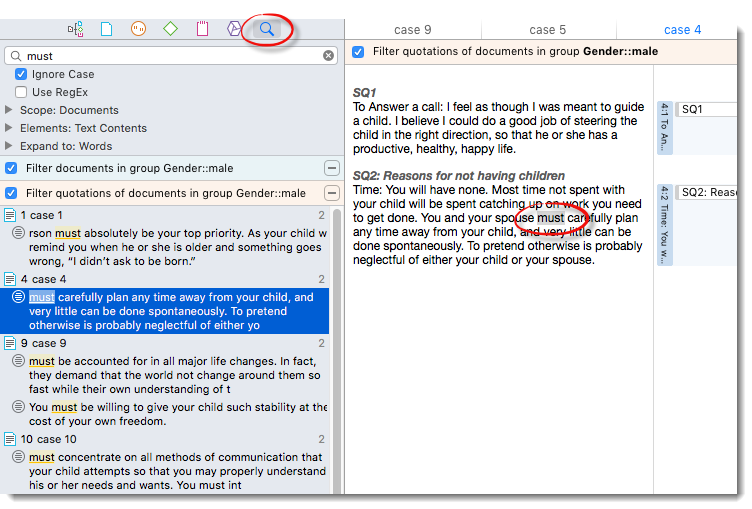
Figure 3.21 Project-wide search
The project-wide search can be useful for other purposes as well, for example, when you want to read something in a comment, but you cannot remember where you wrote it. The Project Search Tool can search for any entity and in any field.