Qualitative Data Analysis with NVivo
Windows
On this part of the website, you have free access to up to date click-by-click instructions for NVivo on Windows. Simply click on the headings below to reveal the instructions.
Use the index of click-by-click instructions as a companion guide to help you find the instructions you need, or browse through the instructions below that accompany this chapter.
Capturing Twitter and Facebook data
- Go to the web page and select the NCapture browser extension (Figure 10.1).
- Depending on what you capture, you will encounter an interface for a Dataset or for a pdf (Figure 10.2).

Figure 10.2 Capturing a Twitter hashtag (left) and Twitter home page (right) with NCapture
- Add a Description for the item and a Memo if you wish. Both will be imported and both can be added or modified later.
- Code at nodes: Add Nodes for coding if you wish, although the entire File will be coded at these Nodes.
- You might wait to code the File, because you will be able to code all or part of it later, after import.
- In Chrome: Capture. The default download location is Downloads.
- In Internet Explorer: Save in either the default location or Browse > Select a location > Capture.
Importing Twitter and Facebook data
After capturing the material, return to your NVivo Project.
- Ribbon: Import > NCapture.
- If you do not see the name of the page you captured > Select Browse to identify the correct folder.
- Select the captures to import by choosing one of the three radio buttons and ticking the desired captures > Import (Figure 10.3).
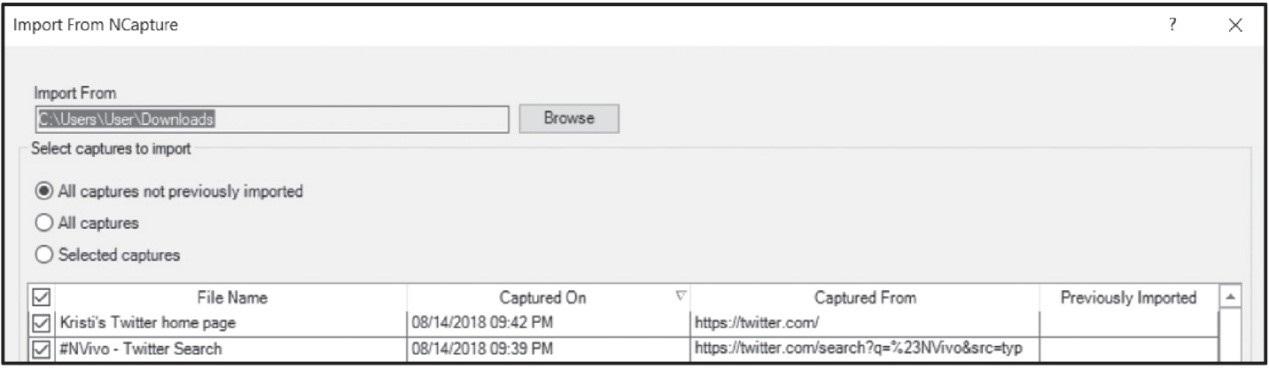
Figure 10.3 Selecting an NCapture file to import
- Navigation View: Data > Files.
- List View: Double-click on the imported File.
Auto Code into Cases and Nodes
- Navigation View: Data > Files.
- List View: Right-click on the Dataset > Auto Code (Figure 10.4).
- NVivo Plus users will first need to Select “Use the style or structure”.
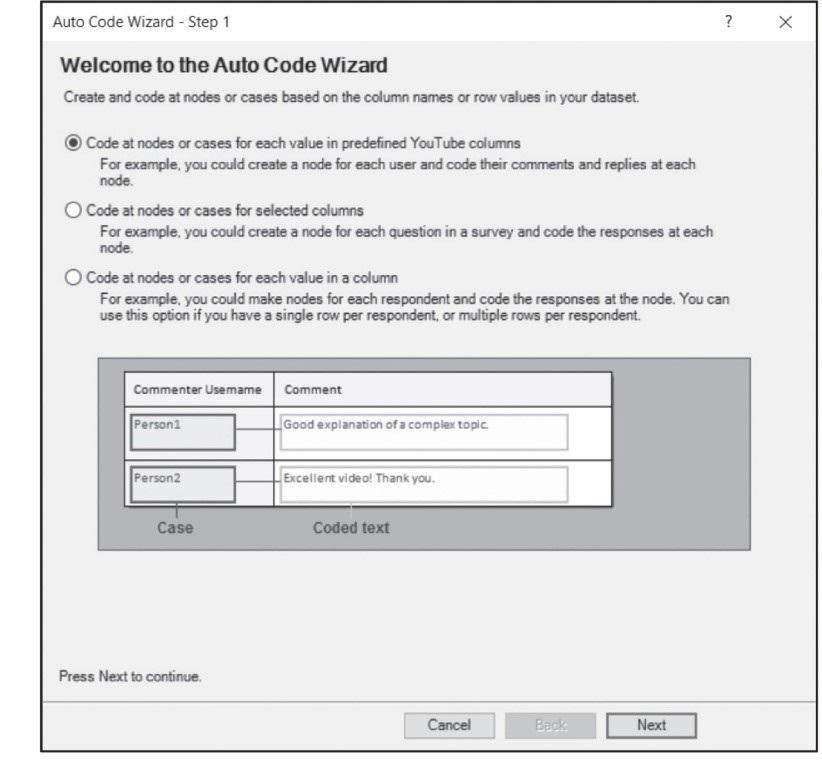
Figure 10.4 Auto Code Wizard
- Create at nodes or cases for each value in predefined Twitter/Facebook/YouTubecolumns > Next.
- Step 2: Leave defaults to create Cases by Username and Hashtag > Next.
- Step 3: Leave the default locations for Nodes and Cases > Finish.
Viewing your Cases
- Navigation View: Cases > Cases.
- List View: Username (Twitter) (you will see a list of Cases).
- Double-click on a Case to see the tweets for that user.
- Right-click on a Case > Case Properties > Attribute Values to see the Name and Location (if available). Later you can Classify Nodes from a Dataset (see the NVivo Help for ‘Automatic coding in datasets’) if you want to add other Attribute Values to this Case.
- Open the web page you want to capture.
- Select the NCapture button (Figure 10.1).
- The NCapture window opens, indicating that the web page will be imported as a pdf (Figure 10.7).
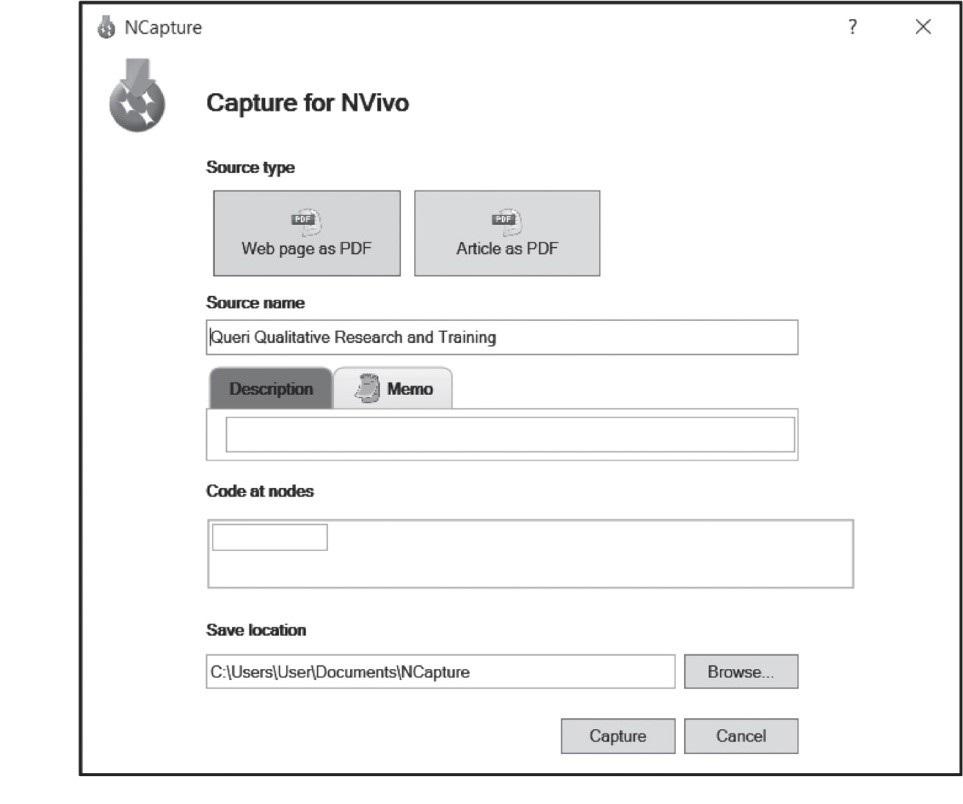
Figure 10.7 Collecting a web page with NCapture via Internet Explorer
- Select ‘Article as PDF’ if you are viewing an online article and wish to exclude unnecessary content such as advertisements and links to other articles.
- Add a Description for the item and a Memo if you wish. Both will be imported with the web page and both can be added or modified later.
- Code at nodes: Add Nodes for coding if you wish, although the entire page will be coded at these Nodes.
- You might wait to code the page because you will be able to code all or part of it later, after import.
- In Chrome: Capture. The default download location is Downloads.
- In Internet Explorer: Save in either the default location or Browse > Select a location > Capture.
The entire web page will have been captured, beyond what was immediately visible on the screen. (i.e., the capture is not limited to what will fit on a single page). These will be saved as .nvcx files, which NVivo will later use to reconstruct the Files as pdfs in your Project.
Import and view a web page
- Ribbon: Import > NCapture.
- If you do not see the name of the page you captured > Select Browse to identify the correct folder.
- Select the captures to import by choosing one of the three radio buttons and ticking the desired captures > Import (Figure 10.8).

Figure 10.8 Selecting an NCapture file for importing as a web page
- Navigation View: Data > Files.
- List View: Double-click on the imported File (Figure 10.9).
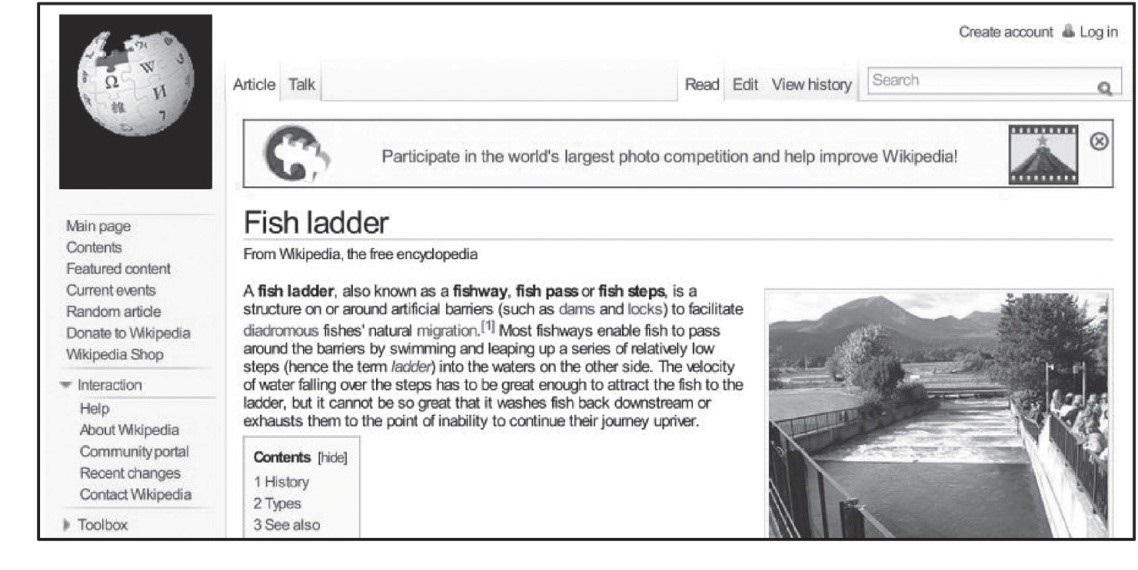
Figure 10.9 A web page converted into a pdf and opened in NVivo