Qualitative Data Analysis with NVivo
Mac
On this part of the website, you have free access to up to date click-by-click instructions for NVivo on Mac. Simply click on the headings below to reveal the instructions.
Use the index of click-by-click instructions as a companion guide to help you find the instructions you need, or browse through the instructions below that accompany this chapter.
As there are some functions in NVivo that can only be carried out in Windows, there are deliberate gaps in the Mac instructions numbering system when a tool is not available. This is so that the numbering system matches the book and the index of instructions.
Getting ready to code
- Navigation View: Data > Files.
- List View: Double-click on the File so it opens.
- Navigation View: Codes > Nodes.
Creating a Node from the Ribbon
- Ribbon: Create > Node > (Figure 3.4) provide a Name and Description.
- We discuss Aggregate in Chapter 4.
- If you wish, you can assign a colour to the Node in order to sort Nodes or view these colours in the Coding Stripes (both of which we discuss later).
- Done.
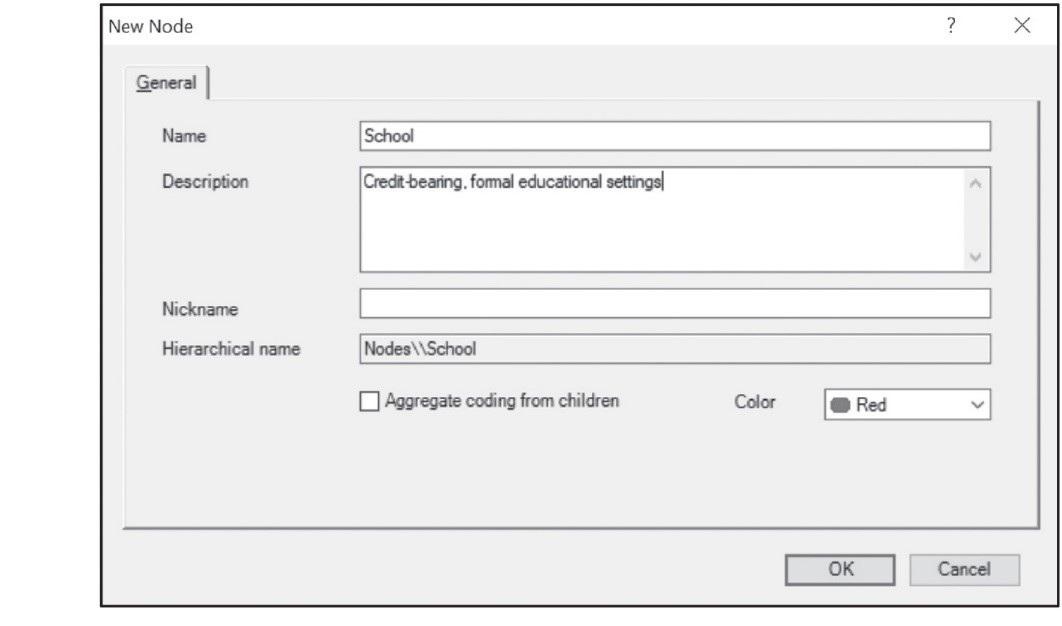
Figure 3.4 The Node Properties window
Creating a Node with a Right-click
This option only works until the List View fills with Nodes. At that point you should use another tactic.
- List View: In the white space (below the Node you just created) Right-click > New top level Node > provide a Name and a Description.
Fill in additional information as described in ‘Creating a Node from the Ribbon.
Coding to your existing Nodes
- Detail View: Select the text to be coded > Drag selected text to a Node (Figure 3.5).
- A brief pop-up message in the Navigation View (next to Nodes) confirms your action.
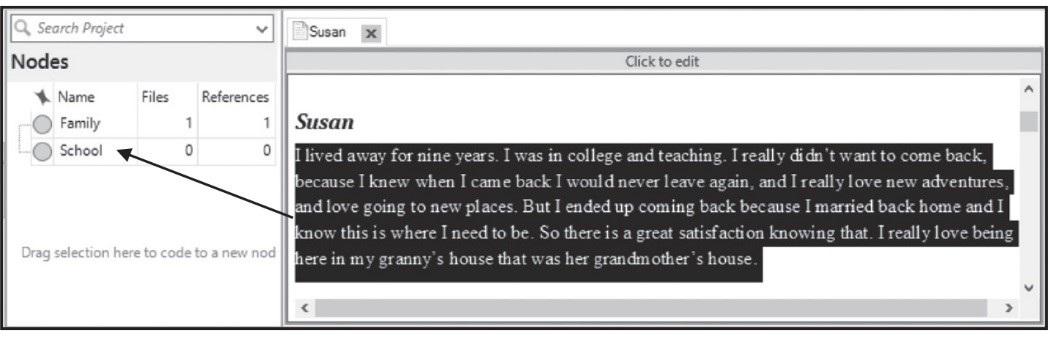
Figure 3.5 Coding to an existing Node via drag-and-drop
Seeing what you coded
- List View: Double-click on the Node and the Reference will be displayed in Detail View.
- Detail View: Each time you code, additional References (across Files) will stack in this window (alphabetically by Folder name and then File name).
- Navigation View: Open Items list (Chapter 1, Figure 1.8) > Select the X next to the Node to close it.
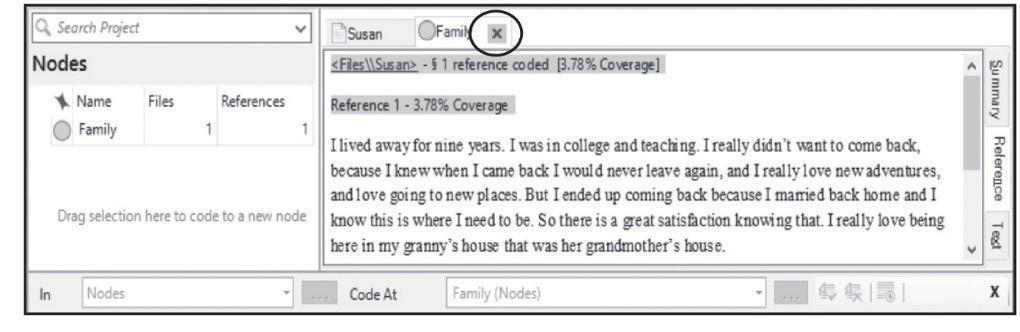
Figure 3.7 Coding for Family displayed by the Node
Changing a Node Description (or name, colour, etc.)
- List View: Right-click on the Node > Get Info > change the Description (or colour, etc.) > Done.
Uncoding from the File
- Detail View: Select text in the File to be uncoded > Right-click and select one of the following two options:
- Uncode Selection > At Existing Nodes or Cases > tick the desired boxes > Select.
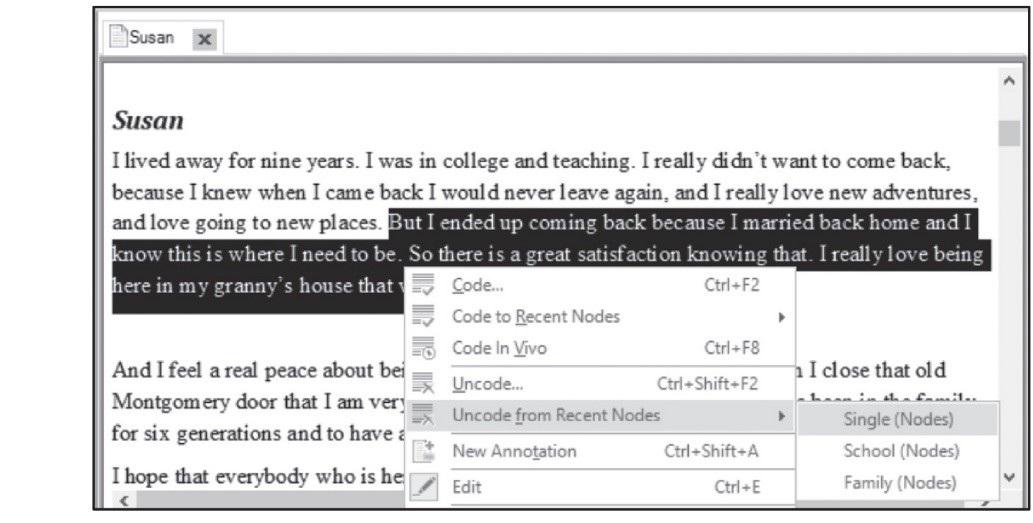
Figure 3.8 Uncoding from the File with a right-click
- Detail View: Click anywhere in the File so NVivo knows you are active in the Detail View.
- Ribbon: View > Coding Stripes > Nodes Recently Coding.
- As you scroll up or down with the Scroll Bar (between the text and the stripes), you see the stripes are anchored adjacent to the text you coded (Figure 3.9).
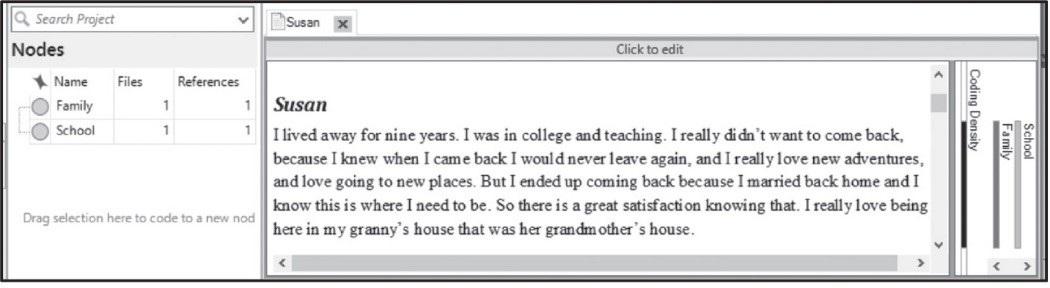
Figure 3.9 Viewing Coding Stripes in a File
Turning on the colours you assigned to the Nodes (if you did!)
- Ribbon: View > Coding Stripes > Use Item Colours.
Coding Density
- With your cursor/pointer, hover over the vertical black/grey/white Coding Density stripe to the right of your text to see the associated Nodes (Figure 3.9).
- The darker the stripe the more Nodes you have applied.
- To modify the default of seeing only seven Coding Stripes
- Ribbon: View > Coding Stripes > Number of stripes (up to 200) > OK.
Viewing coding with the Highlight tool
- Single-click (not twice) on any stripe to turn on Highlighting for that Node in the File.
- To turn the Highlight off go to the Ribbon: View > Highlight > None.
Uncoding with a stripe
- Right-click on a stripe to Uncode (and see additional options).
Expanding coding context
- List View: Double-click on one of your Nodes so it opens > Highlight a portion of a Reference (or multiple references) Right-click > Coding Context > Narrow (to get 5 words on either side as in Figure 3.10).
- Broad provides the context of the entire paragraph.
- Custom allows you to choose a number of words on either side.
- On your keyboard select Cmd + A to select all of the References and then expand the Coding Context of all simultaneously by following the steps above.
- You might need to go to the bottom of the Detail View and drag up to select everything.
- If seeing it as temporary context is insufficient and you want to retain some or all of the context around the coded portion, then select and code text in your usual way (e.g., drag and drop the additional context into the Node). It will show as coded text in the Node next time you open it.
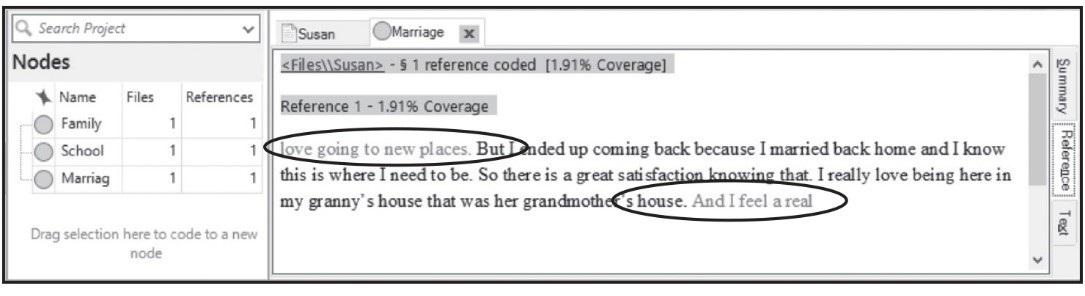
Figure 3.10 Viewing narrow coding context in a Node
Coding from a Node to another Node
- Detail View: Select the text in a Node > Drag it to the List View to another Node.
- This does not uncode the data, it simply adds more coding to the File in the Project.
Coding Stripes in a Node
- Detail View: Click on one of the References (so NVivo knows you are in this window).
- Ribbon: View > Coding Stripes > Nodes Most Coding (Figure 3.11).
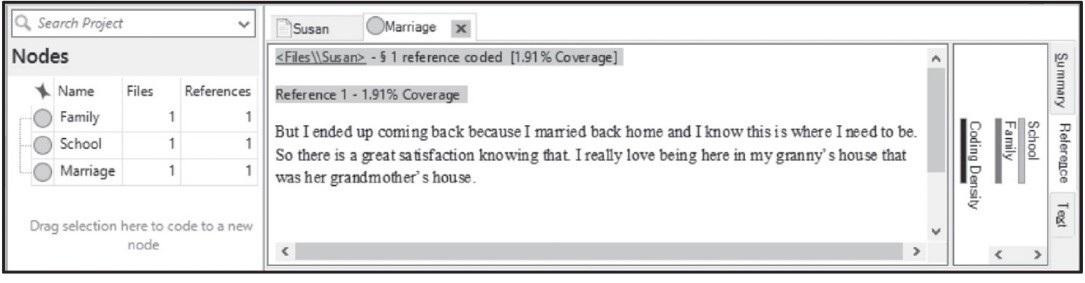
Figure 3.11 Viewing Coding Stripes in a Node
Highlight in a Node
- Single-click (not twice) on any Coding Stripe to turn on Highlighting for that other Node.
- To turn the Highlight off go to the Ribbon: View > Highlight > None.
Uncoding from the Node
- Detail View: Select text in the Node to be uncoded (code the text where it belongs before you uncode it, because it is about to disappear from the screen) > Right-click > Uncode Selection > At This Node.
- As an alternative use Uncode Selection > At Existing Nodes or Cases > tick the desired boxes > Select.
View the context in the File
- To see the data in its full, original context, Right-click on a Reference > Open Referenced File (Figure 3.12).
- Turn Highlight off in the Ribbon: View > Highlight > None.
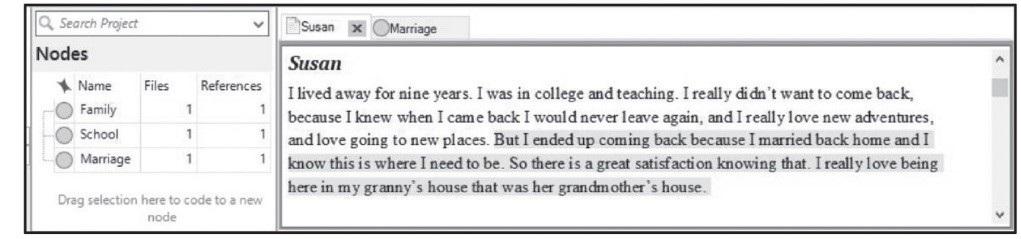
Figure 3.12 Jumping from a Reference in a Node to the File
Moving Nodes
- List View: Select the Node to move > Drag it to the destination (e.g., under another Node, creating ‘parent’ and ‘child’ Nodes. See Chapter 4).
- To move the Node to the top level of Nodes: Drag the Node to the Navigation View: Nodes.
Deleting Nodes
- Navigation View: Codes > Nodes.
- List View: Select the Node to remove from your Project > Right-click > Delete (or click Delete on your keyboard) > Delete. (This also deletes all coding for that Node.)
Merging Nodes
- Navigation View: Codes > Nodes.
- List View: Select a Node > Right-click > Copy > select the other Node > Right-click > Merge into Selected Node > Merge (Figure 3.16)
- List View: Right-click on original Node > Delete > Delete.
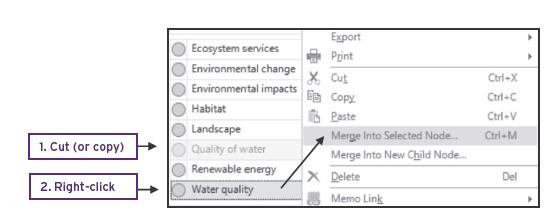
Figure 3.16 Merging Nodes
Using the Highlight to check for intersecting content
- Navigation View: Codes > Nodes.
- List View: Double-click on the first Node to open it.
- Ribbon: View > Highlight > Coding for Selected Items > tick the box next to the second Node > Select.
Yellow highlight indicates content coded at both Nodes. When you run the Coding Query, you will see the same content.
Running a Coding Query
- Ribbon: Query > Coding.
- Select the arrow next to all of these nodes > use the left side of the window to click once on the word Nodes (not the tick box) > use the right side of the window to tick the box next to each of the two Nodes > Select. (Figure 3.21)
- Run Query > the bottom half of the window displays the intersecting content.
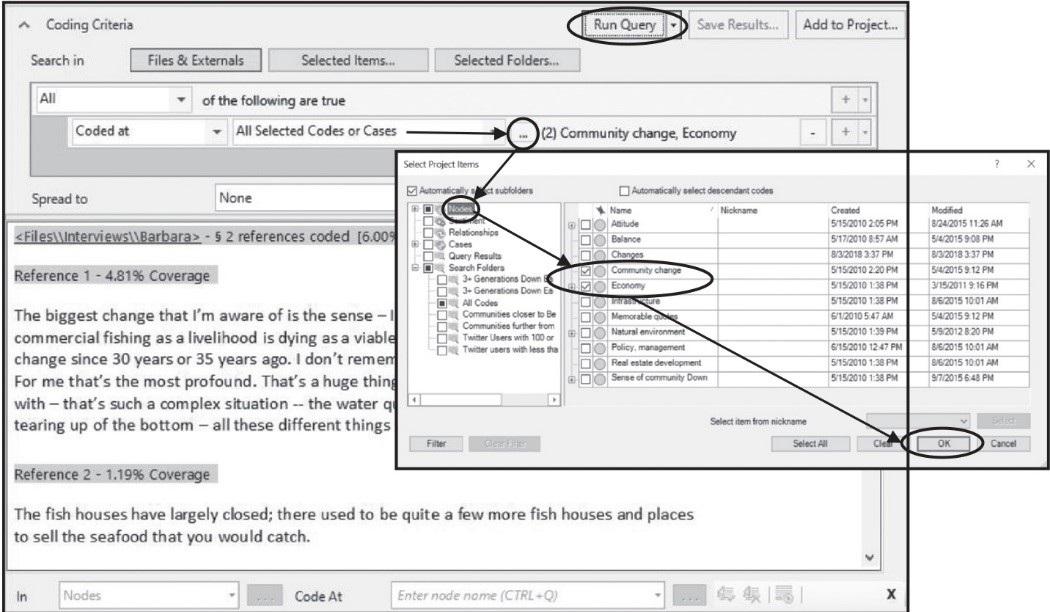
Figure 3.21 Coding Query in the Environmental Change Project on the Nodes Community change and Economy.
For additional information about the options in this Query, see Chapter 7.