Qualitative Data Analysis with NVivo
Windows
On this part of the website, you have free access to up to date click-by-click instructions for NVivo on Windows. Simply click on the headings below to reveal the instructions.
Use the index of click-by-click instructions as a companion guide to help you find the instructions you need, or browse through the instructions below that accompany this chapter.
Create Cases from imported Files (one File per Case)
- Navigation View: Data > Files > Select the Folder with your Files.
- List View: Select Files > Right-click > Create As > Create As Cases > Select the location for these Cases > OK.
Combining multiple Files into a single Case
- Navigation View: Data > Files > Select the Folder with your Files.
- List View: Use Shift + click or Ctrl + Click to select all the Files relating to a single Case from that Folder > Right-click.
- Create As Code > Cases > OK > Name the New Case > OK.
If the Case already exists:
- Select the existing Case and the new data will be added to it > OK.
- All selected Files will be assigned to that Case (Figure 5.6).
- If the Files are in different Folders (e.g., because they contain data of different types), you will need to code the Files from each Folder in separate steps.
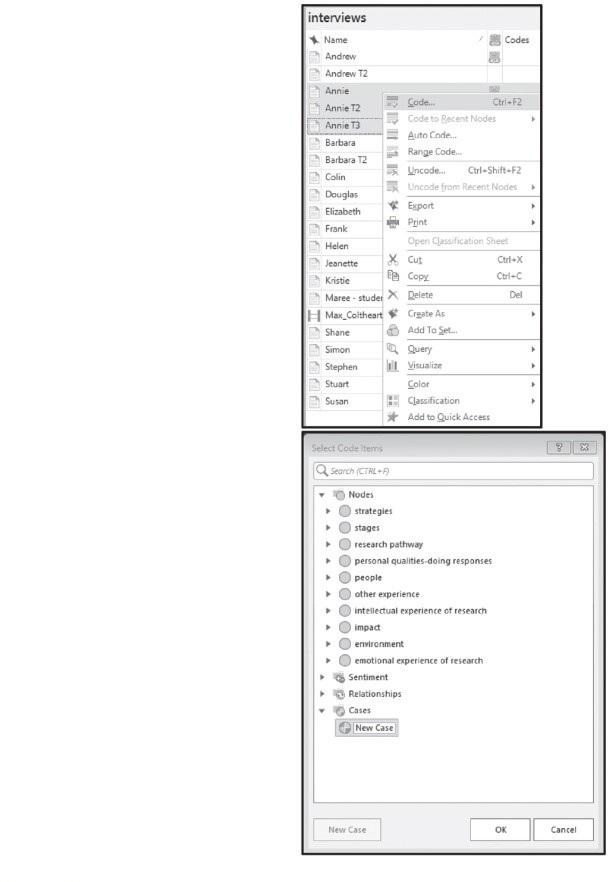
Figure 5.6 Coding multiple Files to a New Case (Windows)
If several Cases have already been created from each separate File (or an additional Case through Auto Coding from part of a shared File) when just one is what is wanted, then use Cut and Merge (Chapter 3) to combine the duplicated Cases into a single Case holding all of the relevant data.
Making Cases from sections of a File
Using participant names above or at the beginning of a paragraph
- Navigation View: Data > Files > Select the Folder with your Files.
- List View: Select the File or Files with multiple (uniquely named) Cases within them > Right-click > Auto Code.
- The Auto Code Wizard will open > Speaker name (Figure 5.7) > Next > Enter each speaker name, followed by Enter (Figure 5.8) > Next > identify a Classification (Figure 5.9) > Finish.
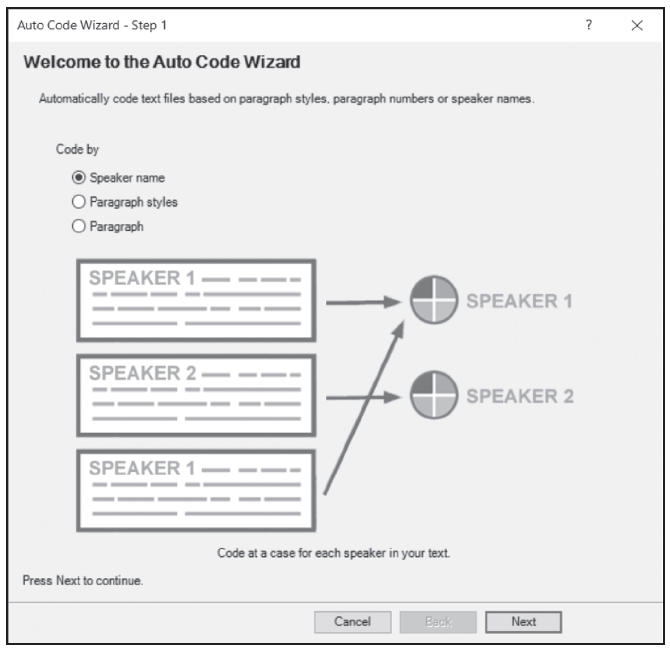
Figure 5.7 Selecting a method for Auto Coding (Windows)
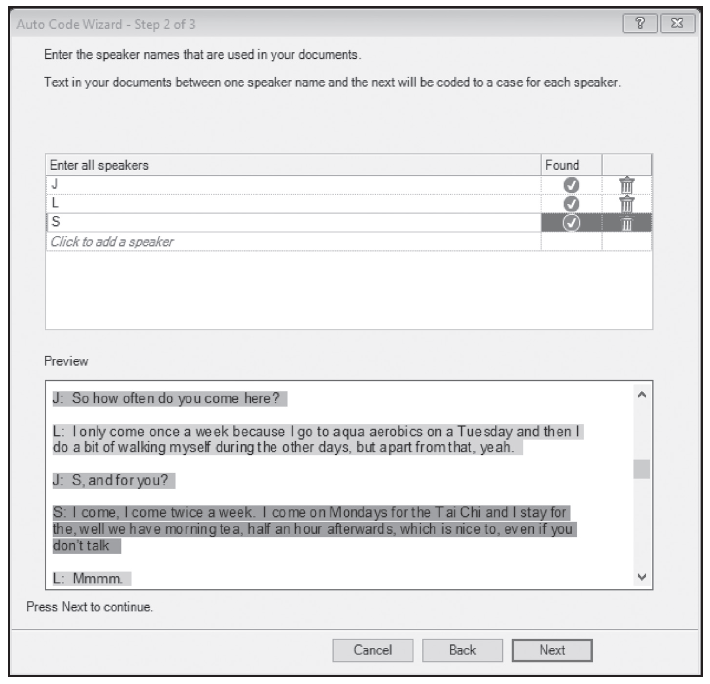
Figure 5.8 Entering speaker names in Step 2 of the Auto Code Wizard (Windows)
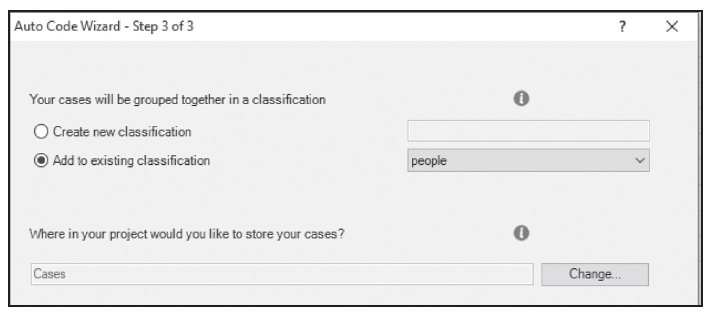
Figure 5.9 Identifying the Case Type (Classification) and location for the new Cases in Step 3 of the Auto Code Wizard (Windows)
Classifying the Cases
At several points along the way during these steps, you were either forced to add a Classification to the Case, or you had the option to do so. In either event, you can check that it worked, or assign the Classification.
- Navigation View: Cases > Cases.
- List View: Select a Case > Right-click > Classification > your Classification should be checked, or you can assign the Classification here by Selecting the correct option.
- Use your Shift key to select all of the Cases if you want to assign them to the same Classification.
Create Attributes with Values
- Navigation View: Cases > Case Classifications > Right-click on the Classification you created earlier > New Attribute.
The New Attribute dialogue box will open (Figure 5.11)
- Provide a short Name for the new Attribute. Add a Description if needed for clarity.
- Select a data Type for the Values of the Attribute.
- Most Attribute Values will be Text, as that includes any combination of letters and numbers, or ranges of numbers, such as 20–29, 30–39. If the Attribute comprises numeric values only, then choose Integer (whole numbers) or Decimal to ensure that they can be correctly sorted. Date values can be entered in local format with day, month, and year, so if you want to record years only, then use Integer. A Boolean attribute can assume two values only (e.g., Yes, No; True, False). If you are uncertain which type to select, choose Text because this type will accommodate any alphanumeric combination.
- Select the tab for Values at the top of the dialogue.
- You will see two Values already listed: these are assumed to be valid options for any Attribute and they cannot be removed. The default Value is set at Unassigned, and in general you should leave this as the default.
- Use the Add / + button on the bottom left to create new rows so you can type in the Values you need for this Attribute. When you are finished, click on OK. Further Values can be added later, if necessary.
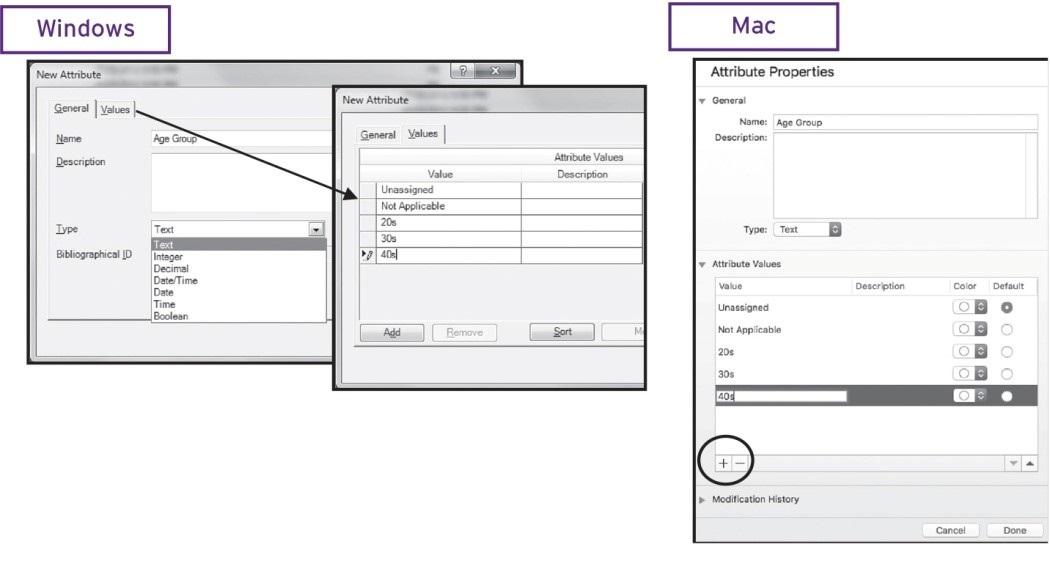
Figure 5.11 Adding an Attribute and Values in Windows (left) and Mac (right)
Add Values to the Cases
- Navigation View: Cases > Case Classifications > [your Classification] > Right-click > Open Classification Sheet.
- The Classification Sheet (Figure 5.12) will open in Detail View, with your Cases in the rows, and the Attributes you have created as the columns. Currently all the Values will be listed as Unassigned.
- Detail View: Click in a cell of the Classification table and select an appropriate Value from the drop-down list for that cell. If the Value you want does not exist, double-click in the cell and overtype Unassigned with your new Value, followed by Enter. The new Value will be added to your list and made available for other Cases with the same Classification.
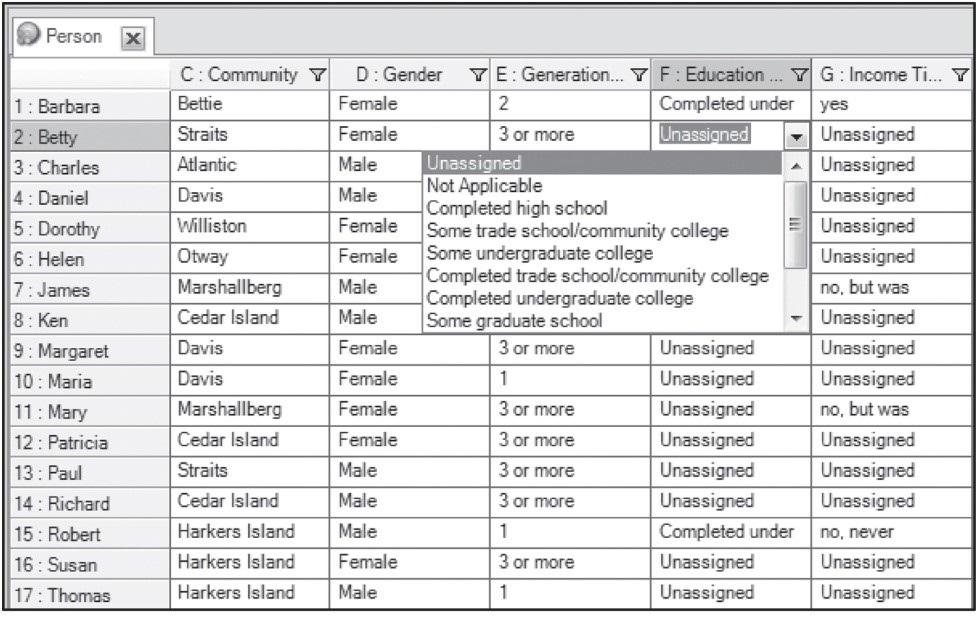
Figure 5.12 Classification Sheet with Attribute Values for interview participants (Windows)
When you are done, check one or two of your Cases to see that the Values are added:
- Navigation View: Cases > Case Classifications > Select [your Classification].
- List View > Click the + (plus symbol) next to a Case to show the list of Attribute Values.
- Ribbon: Explore > Crosstab. The Crosstab Query panel will open in the Detail View (Figure 5.13).
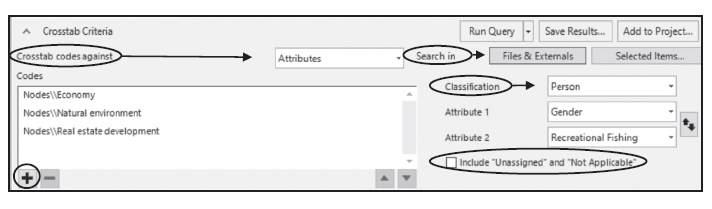
Figure 5.13 Crosstab Query interface (Windows)
- Detail View: Crosstab Criteria > Crosstab codes against > Attributes (the default).
- Add Nodes (or other Codes) to the rows of the Crosstab in one of two ways:
- Navigation View: Codes > Nodes > Select [your Nodes] and then drag from the List View to the Codes box in the Crosstab Criteria dialogue; or
- Detail View: Crosstab Criteria > Click the È (plus symbol) at the bottom left of the Codes panel > Select Project Items (Nodes will be selected already, as a default).
- Check the boxes next to the specific Nodes, or check Automatically select descendent codes and then select the Node at the top of the hierarchy (tree or subtree) of Nodes you want in your Crosstab. OK.
- Use the – (minus symbol) to remove any unwanted selections.
- Select Attribute Values for the columns of the Crosstab:
- Detail View: Crosstab Criteria > Classification > choose which Classification you will work with.
- Select the Attribute within that Classification (usually one) using the drop-down menu. The Values of this Attribute will define the columns for the Crosstab. If a second Attribute is selected, the Values for the second will be shown for each value of the first.
- Tick if you want to Include “Unassigned” and “Not Applicable” values.
- Detail View: Check options at the top right of the Crosstab Criteria dialogue:
- Crosstab Criteria > Search in: Choose whether you want all Files and Externals, Selected Items (particular Files, Nodes, Cases, or Sets), or all files within Selected Folders to be included in the analysis.
- Add to project allows you to store the specification for the Crosstab so that you can run it again at a later time, for example, if you add to or change your data in some way, or for a different Folder of Files or Selected Items.
- Run Query.
- Save Results will store the results for future reference. Saved Results will not be updated if your data change.
- Ribbon: Crosstab Tools > Refine the display using options in the Cell Shading, Layout, Column Headers, and Label Format groups (Figure 5.15).
- Detail View: Double-click on a cell in the Crosstab to see the text associated with that combination of Node and Attribute Value (and see Chapter 7 for additional information).
- Ribbon: Explore > Group.
- Look For > Items by Attribute Value.
- Scope > Select > Case Classifications > [your choices] > OK (Figure 5.18).
- Range > Select > Selected Items (or Selected Folders) > Choose [your Cases] > OK.
- Run. The resulting display will show all Values for each selected Attribute. Expand a value to see the Cases that have that value.
- Detail View: Select the Cases for an Attribute Value. Right-click > Create As Set > Name the Set > OK. Values can be grouped (e.g., Years into Decades) by selecting Cases for more than one Value at the same time.
Resulting Sets are listed in Navigation View: Search > Sets.
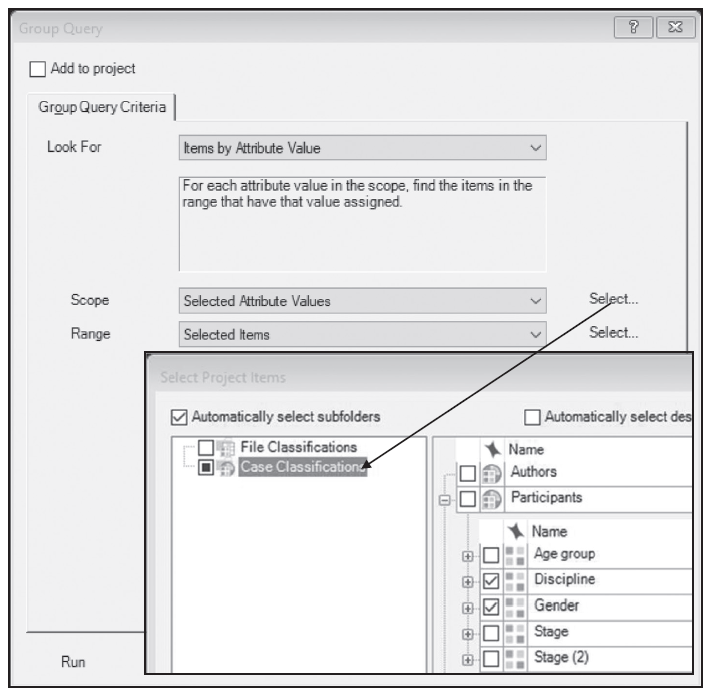
Figure 5.18 Selecting Attribute Values in a Group Query