Qualitative Data Analysis with NVivo
Mac
On this part of the website, you have free access to up to date click-by-click instructions for NVivo on Mac. Simply click on the headings below to reveal the instructions.
Use the index of click-by-click instructions as a companion guide to help you find the instructions you need, or browse through the instructions below that accompany this chapter.
As there are some functions in NVivo that can only be carried out in Windows, there are deliberate gaps in the Mac instructions numbering system when a tool is not available. This is so that the numbering system matches the book and the index of instructions.
Capturing Twitter and Facebook data
- Go to the web page and select the NCapture browser extension (Figure 10.1).
- Depending on what you capture, you will encounter an interface for a Dataset or for a pdf (Figure 10.2).
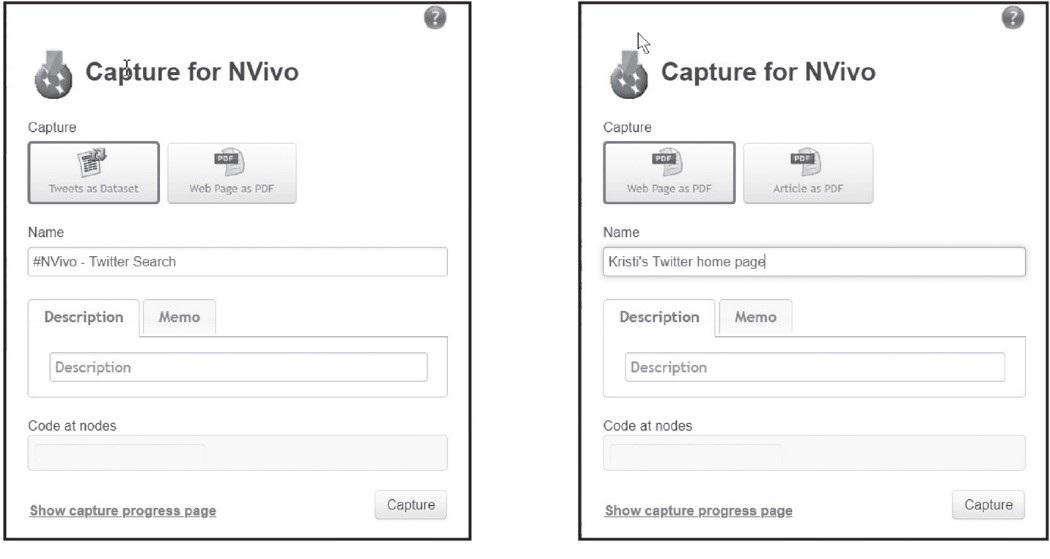
Figure 10.2 Capturing a Twitter hashtag (left) and Twitter home page (right) with NCapture
- Add a Description for the item and a Memo if you wish. Both will be imported and both can be added or modified later.
- Code at nodes: Add Nodes for coding if you wish, although the entire File will be coded at these Nodes.
- You might wait to code the File, because you will be able to code all or part of it later, after import.
- In Chrome: Capture. The default download location is Downloads.
- In Internet Explorer: Save in either the default location or Browse > Select a location > Capture.
Importing Twitter and Facebook data
After capturing the material, return to your NVivo Project.
- Ribbon: Data > NCapture.
- If you do not see the name of the page you captured > Click on the arrow to identify the correct folder.
- Select the captures to import by clicking on All captures not previously imported and ticking the desired captures > Import (Figure 10.3).
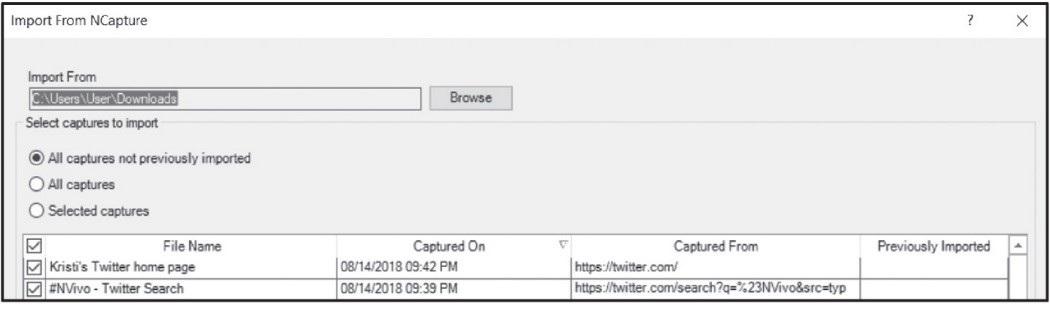
Figure 10.3 Selecting an NCapture file to import
- Navigation View: Data > Files.
- List View: Double-click on the imported File.
Auto Code into Cases and Nodes
- Navigation View: Data > Files.
- List View: Right-click on the Dataset > Auto Code (Figure 10.4).
- NVivo Plus users will first need to Select “Use the style or structure”.
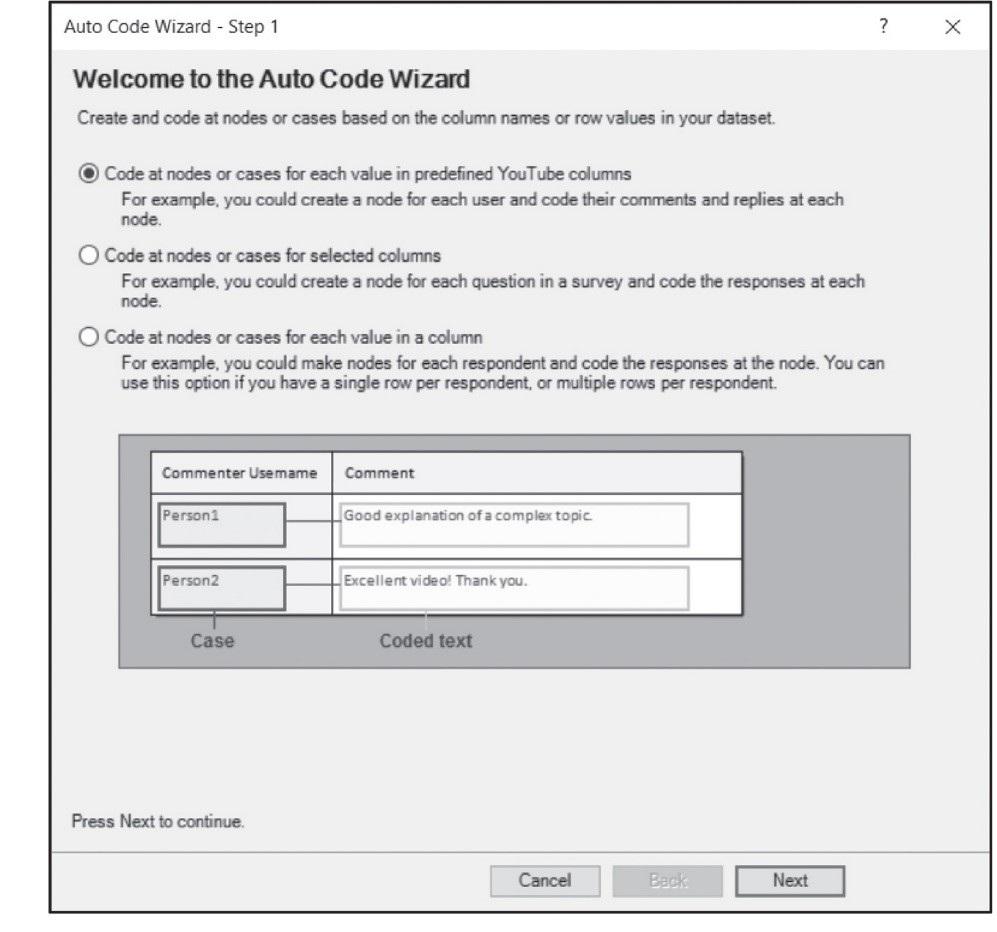
Figure 10.4 Auto Code Wizard
- Create at nodes for each value in predefined Twitter/Facebook/ columns > Next.
- Step 2: Leave defaults to create Cases by Username and Hashtag > Next.
- Step 3: Leave the default locations for Nodes and Cases > Auto Code.
Viewing your Cases
- Navigation View: Cases > Cases.
- List View: Username (Twitter) (you will see a list of Cases).
- Double-click on a Case to see the tweets for that user.
- Right-click on a Case > Get Info > Attribute Values to see the Name and Location (if available). Later you can Classify Nodes from a Dataset (see the NVivo Help for ‘Automatic coding in datasets’) if you want to add other Attribute Values to this Case.
- Open the web page you want to capture.
- Select the NCapture button (Figure 10.1).
- The NCapture window opens, indicating that the web page will be imported as a pdf (Figure 10.7).

Figure 10.7 Collecting a web page with NCapture via Internet Explorer
- Select ‘Article as PDF’ if you are viewing an online article and wish to exclude unnecessary content such as advertisements and links to other articles.
- Add a Description for the item and a Memo if you wish. Both will be imported with the web page and both can be added or modified later.
- Code at nodes: Add Nodes for coding if you wish, although the entire page will be coded at these Nodes.
- You might wait to code the page because you will be able to code all or part of it later, after import.
- In Chrome: Capture. The default download location is Downloads.
- In Internet Explorer: Save in either the default location or Browse > Select a location > Capture.
The entire web page will have been captured, beyond what was immediately visible on the screen. (i.e., the capture is not limited to what will fit on a single page). These will be saved as .nvcx files, which NVivo will later use to reconstruct the Files as pdfs in your Project.
Import and view a web page
- Ribbon: Data > NCapture.
- If you do not see the name of the page you captured > Click on the arrow to identify the correct folder.
- Select the captures to import by clicking on All captures not previously imported and ticking the desired captures > Import (Figure 10.8).

Figure 10.8 Selecting an NCapture file for importing as a web page
- Navigation View: Data > Files.
- List View: Double-click on the imported File (Figure 10.9).

Figure 10.9 A web page converted into a pdf and opened in NVivo