Qualitative Data Analysis with NVivo
Mac
On this part of the website, you have free access to up to date click-by-click instructions for NVivo on Mac. Simply click on the headings below to reveal the instructions.
Use the index of click-by-click instructions as a companion guide to help you find the instructions you need, or browse through the instructions below that accompany this chapter.
As there are some functions in NVivo that can only be carried out in Windows, there are deliberate gaps in the Mac instructions numbering system when a tool is not available. This is so that the numbering system matches the book and the index of instructions.
Passwords
Passwords can be added to specific Projects to allow for Read/Write access or Read Only access.
- File: / Menu Bar: File > Project Properties > Passwords.
- If you enter a Read/Write Password, you will also enter a Read Only Password.
- You will be asked for the Password the next time you open the Project.
Recording Memos and tracking Users
- With a Memo such as Teamwork in NVivo open and in edit mode, add the date and time (Cmd + Shift + T) to track the chronology of ideas about team protocols, and write something about your team process (e.g., ‘We need to identify someone to manage the backup of our Projects.’).
- Close the Detail View and look at the columns that are visible in the List View (Figure 11.1).

Figure 11.1 List View of Memos with Detail View closed or on the bottom
This is your first glimpse of NVivo’s ability to track researchers. This list is available for every type of item in the List View of your project (Files, Nodes, Attributes, Sets, Queries, Maps, etc.).
Identifying Users
If you are working on a solo copy of the project, on your own computer, ensure that it is correctly registering you (and not the administrator) as the User each time you open the software. If you work on a shared computer, the default setting that does not prompt for the user on launch should be changed (Figure 11.2).
- Menu Bar: NVivo12 > Preferences > Prompt for user on launch (check the box).
Subsequently, each time a researcher launches the software on the computer they will be asked to provide their login name and initials.

Figure 11.2 Setting the Application Options to ‘Prompt for user’ on launch in Windows (left) and Mac (right)
- File > Project Properties > rename the Title > OK > Save the Project (Figure 11.4).
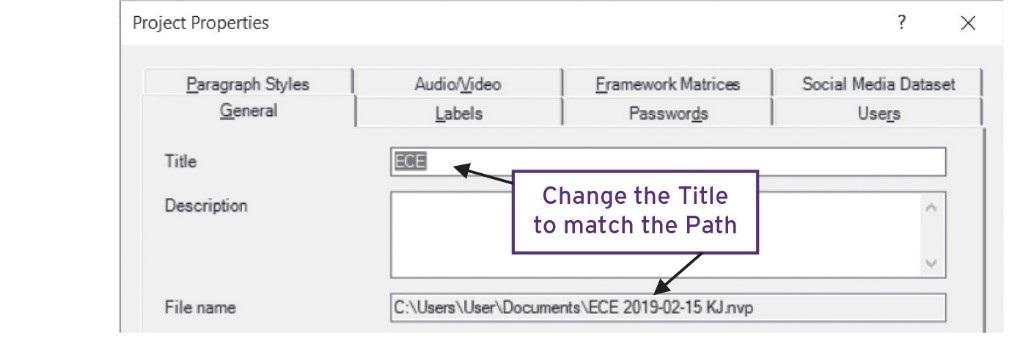
Figure 11.4 Changing the Project Title to match the Project Path (or File Name) (Windows)