Qualitative Data Analysis with NVivo
Student Resources
Windows
On this part of the website, you have free access to up to date click-by-click instructions for NVivo on Windows. Simply click on the headings below to reveal the instructions.
Use the index of click-by-click instructions as a companion guide to help you find the instructions you need, or browse through the instructions below that accompany this chapter.
7.a. To create and Run a Query
- Ribbon: Explore > Select the Query you want to run.
- Enter the criteria from one of the following Queries > Run Query.
See the section after the last Query (Coding Comparison Query, later in this chapter) for more information on saving Queries and handling Query Results.
7.b. Word Frequency Query interface
This is a wide net and captures question numbers, participant names, etc. You may instruct NVivo to ignore words by adding them to the Stop Words List (for both this and the Text Search Query):
- File: > Project Properties > General tab > Stop words.
You should look at the words already in this list by default, which includes conjunctions, pronouns, etc. Delete any that you would like to appear in your word-based Queries (e.g., because and if can be useful if you are looking for causal relations). The customization is only set for the current Project, but you can save it in a document and paste it into other Projects if you wish.
- Search in: By default, NVivo will look in all of your Files and Externals.
- Selected items: Allows you to scope the Query to a smaller area of the Project, including Files, Nodes, Sets, etc.
- Display words: Allows you to set the number of words or Select All.
- With minimum length: Allows you to set a number for the minimum number of characters in order to eliminate short words.
- Grouping: Allows you to combine similar words, such as stemmed words.
- Run Query: Generates the output in the bottom half of the Detail View.
- Note the tabs on the right margin in the Detail View to access the Word Cloud, etc.
- Right-click on a word in the list or any of the visuals > Create As Code.
- Double-click on any word in the Result to go to the data and investigate further.
- Right-click on any word in the list or any of the visuals > Add to Stop Words List.
- After you run the Query, see other available options in the Ribbon: Word Frequency Query.
7.c. Text Search Query interface
- Search in: By default, NVivo will look in all of your Files and Externals.
- Selected items: Allows you to scope the Query to a smaller area of the Project, including Files, Nodes, Sets, etc.
- Search for: Allows you to add any words or phrases using quotation marks for phrases.
- See information at the beginning of the Word Frequency Query section regarding Stop Words, as they apply here as well.
- Special: Provides operators such as the spanning wildcard (*) and alternator (OR), but once you learn these you can simply type them into the window yourself.
- Spread to: automatically selects additional material around the word or phrase for inclusion in the Result (you can also do this later).
- Find: Allows you to combine similar words, such as stemmed words, synonyms, specializations and generalizations.
- Run Query: Generates the output in the bottom half of the Detail View.
- Note the tabs on the right margin in the Detail View to access the Word Tree, etc.
- After you run the Query, see other available options in the Ribbon: Node.
7.d. Crosstab Query interface
- Crosstab codes against: By default, the columns of your Crosstab will be Attribute Values but you can select Cases if you prefer.
- Search in: By default, NVivo will look in all of your Files and Externals.
- Selected items: Allows you to scope the Query to a smaller area of the Project, including Files, Nodes, Sets, etc.
- Plus symbol: Takes you to the Select Project Items window to identify the rows of your Crosstab. Or you can drag them into the relevant panes from List View.
- Classification: When you select the Classification of interest, you can further identify either one or two Attribute Values.
- Include “Unassigned” and “Not applicable”: Tick this box if you want to see the potential impact of missing data.
- Run Query: Generates the output in the bottom half of the Detail View.
- Note the tabs on the far right side of your screen to access the Chart.
- The Results of the Crosstab present a Case count by default but you may change this to Coding References by right-clicking on any cell > Cell Content > Coding References.
- Double-click on a cell to see the intersecting material.
- After you run the Query, see other available options in the Ribbon: Crosstab.
7.e. Matrix Coding Query interface
- Search in: By default, NVivo will look in all of your Files and Externals.
- Selected items: Allows you to scope the Query to a smaller area of the Project, including Files, Nodes, Sets, etc.
- Rows plus symbol and Columns plus symbol: Allows you to choose Select Items (or Select Attribute Values) > in the Select Project Items window to identify the rows and columns of your Matrix Coding Query.
- Coding at rows: Allows you to change the default logic of AND (intersection) to OR, NOT, NEAR, PRECEDING, or SURROUNDING.
- Run Query: Generates the output in the bottom half of the Detail View.
- Note the tabs on the far right side of your screen to access the Chart.
- See other available options in the Ribbon: Matrix.
7.f. Coding Query interface
- Search in: By default, NVivo will look in all of your Files and Externals.
- Selected items: Allows you to scope the Query to a smaller area of the Project, including Files, Nodes, Sets, etc.
- All: Indicates that all of the lines of criteria in the entire Query must be true (think of it as an intersection). This can be changed to ‘Any’, which instructs NVivo to retrieve data if it satisfies any of the lines of criteria (think of it as a union).
- For the individual lines in the criteria:
- Coded at: Can be changed to Not Coded At.
- All Selected Codes or Cases: The default option indicates that all of the items within the line must be true (Boolean AND). This can be changed to ‘Any Selected Code or Case’ (Boolean OR) or ‘Any Case Where’ (which allows you to identify an Attribute Value instead of a Code or Case).
- Three dots (…): Allow you to select the items > OK.
- Plus symbol and minus symbol: Add another line of criteria or remove a line of criteria.
- Run Query: Generates the output in the bottom half of the Detail View.
- Note the tabs on the far right side of your screen to access the Chart and Summary.
- See other available options in the Ribbon: Node.
7.g. Compound Query interface
- Subquery 1 and Subquery 2:
- If the desired content field is text, leave the default at Text Search Query > Criteria and enter the text.
- If the desired content field is a Node or Coding Query Result, change the default to Coding Query > Criteria. Use the Simple tab to identify an item or multiple items. Use the Advanced tab to run a more complex operation. (The interface is very similar to the Coding Query interface described earlier.)
- NEAR Content: Can be changed to PRECEDING Content, SURROUNDING Content, AND, OR, or NOT.
- Options: If using NEAR or PRECEDING, this allows you to specify the Proximity (such as Custom Context) and to Specify a range (if relevant). Also tick the boxes for the data you want to Retrieve > OK.
- In: By default, NVivo will look in all of your Files and Externals.
- Selected items: Allows you to Select a portion of the Project in which to search, including Files, Nodes, Sets, etc.
- Where: Provides options for the Users you want to include in order to further scope the portion of the Project in which to search. This option is rarely used.
- Run: Generates the output in the Detail View.
- See other available options in the Ribbon: Node.
7.h. Group Query interface
- Look For: Provides seven options of the type of list. Experiment to find the one you want but the common options are:
- Items Coding (e.g., a list of the Nodes coded to each selected File).
- Items Coded At (e.g., a list of the Files coded to each selected Node).
- Scope: Limits the items to include.
- Range: Limits the kind of items retrieved in the list.
- Coded By: Select data coded by particular team members (only available in Items Coding and Items Coded At).
- Run: Generates a list of items satisfying the criteria in the bottom half of the Detail View.
- Note the tabs on the far right side of your screen to access the Connection Map.
7.i. Coding Comparison Query interface
- User Group A and User Group B: Allows you to choose one or more Users to compare with one or more other Users.
- When selecting a group of users instead of a single user, NVivo treats their coding as though it was conducted by one researcher.
- Scope: By default, NVivo will look in all of your Files and Externals.
- Selected items: Allows you to scope the Query to a smaller area of the Project, including Files, Nodes, Sets, etc. Other options are also available.
- At: Determines the Nodes you want to include.
- Selected Nodes: Select allows you to scope the Query to a subset of Nodes. Other options are also available.
- Calculations based on:
- The character level.
- Run: Generates the output in the Detail View.
- To compare the coding of a Node at a File:
- Double click on a row.
7.j. Saving the Query to your Project, modifying your saved Query and saving the Query Results to your Project
Saving the Query to your Project
To save the Query so you can run it later without having to reconstruct it:
- Detail View: Add to Project > provide a Name and Description > OK.
If you closed the Query and want to save it to your Project:
- Ribbon: Explore > Last Run Query to re-open and save it.
Modifying your saved Query
The Query has a permanent location in your Project unless you modify or delete it:
- Navigation View: Search > Queries.
- List View: Right-click on the Query > Open Query.
Saving the Query Results to your Project
Outside of your Project
You can Export the results from any of the Queries to save them elsewhere on your computer:
- Detail View: Right-click > Export.
Inside your Project
You can save the Query Results from most of the Queries and store them inside the Project, with the exception of the Word Frequency, Group, and Coding Comparison Query Results.
- Detail View: Save Results (or sometimes via the Query Options tab in the Query or in the Ribbon: Query/Store Query Results).
- Navigation View: Search > Query Results.
This location provides a fixed-in-time view of your data. If you wish to modify your Results, you will need to either (a) rerun the Query with changed specifications, or (b) copy and paste the Result into your Node system. Because the output is then stored in a Node, you will be able to add or remove coding from it.
7.k. Creating and filling a Framework Matrix
Creating the framework
- Ribbon: Create: Framework Matrix.
- Provide a Name and Description.
- Rows tab: Select the Cases you want to examine. (Optionally Select attributes to sort the rows by > Select the Attribute.)
- Columns tab: Select the Nodes you want to examine.
- OK.
You are looking at an empty table with the rows and columns specified. When you click in a cell for any Case, the column on the right-hand side of the screen will be populated with all the data for Case. This will allow you to read through and create a summary in the cells even if the data have not yet been coded for that Case. If your data are coded, then you can choose to show only the Node data that intersects with the Case for the selected cell:
Show intersecting content
- Ribbon: Framework Matrix > Associated View > Cell Coding.
Adding your summaries
- Select the first cell for which data are available. Read through the data for that cell, and type a summary into the cell. Continue to create a summary in each cell for which you have data.
Create a link between your summaries and the quotes
- Select a passage from the data that supports your summary statement > Right-click > Copy.
- Select the part of the summary you wrote > Right-click > New Summary Link. Clicking in the pink highlighted link in the text (at any time) will activate the link, illuminating the associated passage with yellow highlight.
Automatically fill the cells with intersecting content
- Ribbon: Framework Matrix > Auto Summarize.
Export (e.g., for printing)
- Detail View: Right-click > Export Framework Matrix.
7.l. Using a predefined Report
To see a description of what any predefined Report provides:
- Navigation View: Output > Reports.
- List View: Right-click on a Report > Report Properties.
Alternatively, a description of each is provided in Help.
Filtering and running a Report
When you select a Report in List View, a dialogue such as that in Figure 7.18 will open, listing the fields of the report for which you can select data.
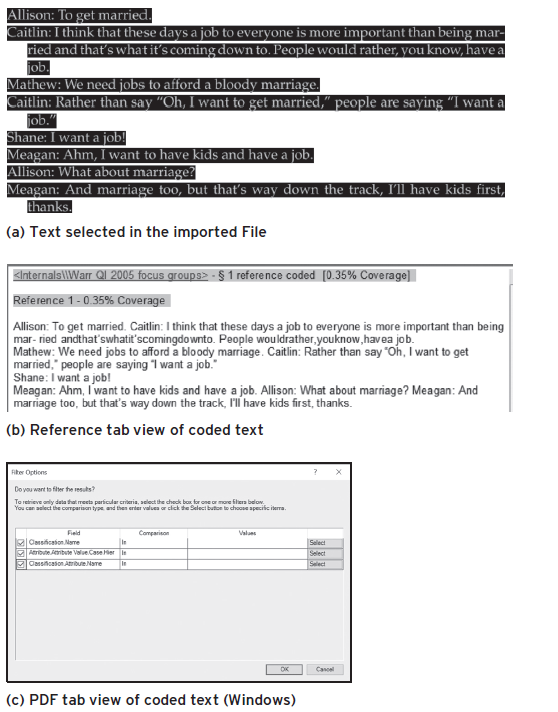
Figure 7.18 Filter options in a Case Classification Summary Report (number of Cases with each Attribute Value)
- Click in a checkbox next to Field.
- Look at the options under Comparison and Select for Values to help understand what filters are available > make your selections accordingly > OK.
When a Report opens in Detail View, it can be cramped and difficult to see, especially if you have your Detail View on the right-hand side of the NVivo window. Either change your Detail View to the bottom of the window and/or remove the map and preview panes:
- Ribbon: Home > Detail View > Bottom.
- Ribbon: Report > Uncheck Report Map and/or Thumbnails.