Using Software in Qualitative Research
A Step-by-Step Guide
Chapter 6 – Exploration and Data-level Work
Download the pdf for this chapter guide here.
Chapter 6 in the book is all about working at data-level. Being immersed in the data for some researchers is part of familiarising with and analysing the data. You may need this before coding or to enrich and substantiate the coding process (chaps 7-9). Remaining close to the data will be more important for some researchers, but for all, the functions covered may be key analytic processes in many different approaches to qualitative research. See all coloured illustrations (from the book) of software tasks and functions, numbered in chapter order.
Sections included in the chapter:
Annotating
Marking data
Data reduction
Text searching
Word frequencies
Text mining
Hyperlinking
Difference between memo and comments
As mentioned in exercise 2, using memos as comments is not a good idea. You will soon feel lost in your long list of memos, which are actually most likely comments. An often observed result is that users stop writing “memos”, at least within ATLAS.ti. A better idea is to write proper comments instead.
The difference between a comment and a memo is that a comment is not an object of its own; it is always linked to the object it describes. A memo has a title and can be grouped into a type. It can also be a stand-alone object. If not, then it linked to another object, e.g. a quotation.

Figure 1: Difference between a memo and a comment
Writing a quotation comment
This is how you write a comment for an existing quotation:
- Activate the quotation and right click on the highlighted area. Select the option Edit comment

Figure 2: Writing a comment for a text quotation
An editor opens. Note this is a simple text editor that does not require you to enter a title or to define a type. The title bar shows the quotation ID.

Figure 3: The comment editor
- Write a comment and click on the Save button
Three changes on your screen indicate that this quotation now has a comment. The top of the quotation bar looks like a triangle and in front of the quotation in the Quotation Manager; you see a tilde sign (~). Attached to the quotation icon is a post-it now.

Figure 4: Indicators of quotation comments
Reviewing quotation comments
- If you want to read the comment, double click on the quotation bar, or open the Quotation Manager.

Figure 5: Reviewing quotation comments in the margin area
Quotation comments are also included in reports. If there are comments, then ATLAS.ti will ask you whether they should be included in the report. If you want to review all of your comments at once, do the following:
- Open the Quotation Manager
- Select the menu option Quotations / Filter / commented
You can now click through each quotation and read the comment at the bottom of the window, or create a report of all commented quotations:
- Select Output / All Quotations
- Confirm the message that pops up to include all comments (and memo and hyperlinks, if any)

Figure 6: Confirm to include quotation comments in the report
- Select Editor as output destination

Figure 7: Report of all commented quotations
When analysing video data, the mouse click for creating and writing comments are the same as above. But the application is likely to be different. Let’s take a look at case study C, the Coca-Cola study.
Using quotation comments for partial transcriptions
Load the 1960s Coca-Cola commercial. Most of it is set to music. After about 50 seconds, a voice over starts for about 8, 5 seconds. Thus, preparing a transcript for the 1 minute video clip does not add much value. In order to capture the voice-over, you can write the text into a quotation comment.
During the last 10 seconds of the commercial, a Coca-Cola bottle, parts of a bottle or the name Coca-Cola is continuously shown. This has been coded with the code “branding”. The quotation comment field can thus be used to transcribe the voice-over.
- If you work on the un-coded version of the project, mark the last ten seconds of the commercial and code it with the code “branding”
- Right-click on the highlighted area (or the quotation bar) and select the option Edit Comment

Figure 8: Writing a comment for a video quotation
- Listen to the voice-over and write it into the comment editor
- Click on the check-mark to save the comment and close the window

Figure 9: Use quotation comments for partial transcriptions
The top of the quotation bar displays a triangle and in front of the quotation entry in the Quotation Manager, you see a tilde ~ (see Figure 4).
Making use of QuotatIOn comments when Preparing a verbatim Transcripts
In case there is more spoken text, it is worthwhile to prepare a verbatim transcript of the video. This is best done in form or an associated document (A-Doc). This means that the transcribed text is directly linked to the video file, and text and video are synchronized via time marks.
For your continuing work, you can code the textual transcript and the video in different ways focusing on the information that is transported with each media type. In terms of working with quotation comments, this means you generate textual and video quotations and can use the comment field to note down ideas, observations and first interpretations as relevant for the media type. The mouse clicks for writing video quotation comments are the same as described in the section “Writing a quotation comment”. See also Figure 8.
Preparing a verbatim transcript for a video file
The procedure is that you create a new empty text document, associate it with the video file and begin to transcribe it. In the following the 1979 commercial “The Olympic Dream” is used as an example.
- From the main menu, select Documents / New / New Text Document
- Enter a name for the transcript file like “1979 The Olympic Dream transcript”
- Load the video file of the 1979 commercial into the second region. This is easiest done by opening the navigation pane on the left hand side of the screen and dragging the video PD onto the plus sign on the right hand side of your screen (see Figure 15)
- To associate the two documents, select Documents / A-Docs / Associate with PD from Region and click on the listed document. The Association Editor opens (see Figure 10).
For the purpose of transcription, there is no need to view the margin area. Therefore you may want to close it in order to save some space on your screen. Select the main menu option Views / Margin Area. You need to do it for both regions.
Make sure that the synchro mode is active in the Association Editor. In addition you can activate the rewind button. This means that the video rewinds 1 to 5 seconds after each section you transcribed to double check your transcript. Click on the Audio menu to select the desired rewind interval.

Figure 10: Settings in the Association Editor
- In the Association Editor, click on the Play/Pause button (alternatively, click the F4 button)
- Click on the Play/Pause button (or F4) again when you want to type
- Type whatever you want to transcribe. Click on the Anchor button or the F8 key to set a time mark. Time marks are indicated as red dots in the transcript

Figure 11: ATLAS.ti transcript with time marks
- Repeat the above sequence: Click the play/pause button (F4), listen to and view the video, click play/pause or F4 again, type, click on the anchor button or F8. Click play/pause (F4) and so on
Once in a while, save your transcript by clicking on the edit button in the main tool bar (). If you finished with the transcript, select .

Figure 12: The Edit menu in the main tool bar
NOTE: It is recommended saving your HU every time you save your transcript. Only then is the text you typed secure and saved.
Viewing synchronized video passages
Once you are finished, you can view the associated video segment as follows:
- Highlight a part of your transcript and click Strg+P. The associated video is played (make sure you are in synchro mode)
If the video is not already loaded, it will be loaded into a new region. The more time marks you have set, the better the synchronisation.
Viewing both video and transcript, you may get some ideas about how the visual relates to the text and vice versa. Such relations can be captured via hyperlinks, a topic that is discussed in the next exercise.
When working with hyperlinks, the original sequential data is de-linearized. Hyperlinks make it possible to traverse from one piece of data to another piece of data regardless of their original positions. You can link data segments within a document or across documents. Links can have the character of a chain or a star.

Figure 13: Hyperlinks – star and chain links
A star form means that the same quotation is used source and linked to different target quotations. When creating a chain the source quotation points to a target quotation, this in turn becomes a source and points to another target quotation.
Creating a star link
The star links in Figure 9 show a relation between various quotations indicating emotional distress. A respondent from focus group 5 reports that a lot of employees get sick because of the pressure they feel at work (quotation 5:16). This is supported by respondents in focus group 2 (quotations 2:16, 2:23 and 2:36. If you want to create such a star, do the following:
- Open the Code Manager and double click on the code “emotional: distress”
- Select quotation 5:16
- Right-click on the highlighted quotation, and select the option Create Link Source

Figure 14: Creating the link source
- Select quotation 2:16, right click and select the option Create Link Target
- A menu opens that shows a number of relations. Select “supports”
The set of relations you see come with ATLAS.ti. It is however possible to create user-defined relations in any language. To do this open the relation editor, e.g. Networks / Edit Relations / Hyperlink Relations. In the relation editor, select Edit / New Relation.The set of relations you see come with ATLAS.ti. It is however possible to create user-defined relations in any language. To do this open the relation editor, e.g. Networks / Edit Relations / Hyperlink Relations. In the relation editor, select Edit / New Relation.

Figure 15: Selecting a relation
- Next, you can choose whether you want to create a star, a chain or to finish linking. Select Star: Leave 5:16 as source

Figure 16: Create a star by linking the next quotation to the same source
- Select quotation 2:23, right click and select Create Link Target
- Continue with creating a star and proceed likewise with quotation 2:36. Then Quit Linking
You can see the hyperlinks in the margin area.
- If you double click on the link, the linked quotation is shown in form of a post-it note
- Click inside the post-it note to jump to the linked quotation

Figure 17: Viewing the hyperlinked quotation
The hyperlinked quotation is opened up in a new region so that you can see the hyperlinked quotations side-by-side.
- If you want to visualize your network as shown in Figure 9, right click on the hyperlink in the margin area and select Open Network. Position the nodes in the network as you like
Creating a chain link across regions
![]() In the exercise above, we showed you how to create hyperlinks using the context menu. Below, you will learn how to utilize the multi-region view to create hyperlinks
In the exercise above, we showed you how to create hyperlinks using the context menu. Below, you will learn how to utilize the multi-region view to create hyperlinks
- Load document P4 and go to paragraph 94 (quotation 4:29). Highlight the quotation coded with “consumption: none”
 Open the navigation pane at the left-hand side of the screen by clicking on the three triangles
- Drag document P2 onto the plus sign on the right hand side of the screen. This loads the two documents side-by-side. Close the fly-out window to save space on your screen

Figure 18: Opening two documents side-by-side
- Jump or scroll to paragraph 62 in document P2 that is coded with “consumption: discounts” (2:30)
- Click on the quotation bar of quotation 4.29, hold down the left mouse key and drag the mouse over to quotation 2:30 and left click
- The list of relation opens, select “contradicts”

Figure 19: Linking across two regions
- To continue the chain, you can either use the context menu as explained above setting quotation 2:30 as source; or if you want to use the drag & drop method again: position P4 at paragraph 27 – 29 (quotation 4:7) and link the two quotations across the two regions
Linking different media types
For the next exercise, I use the Coca-Coca example again. If you take a look at the mission document, one of the missions is “to inspire moments of optimism”. This can for example be found in the commercial from 1979 “The Olympic Dream”.
- Load the 1979 video commercial
- Click on the red dot in the right hand corner of the document bar to load the associated transcript

Figure 20: Load associated document
- Use the navigation pane to load the PDF document “ Coca-cola – Mission” into the third region (see Figure 18)
Textual references to the second mission: “to inspire moments of optimism” has already been coded. Now we want to link it to the video segments that visually support this mission.
- Activate the mission code in the transcript and play the associated video by clicking Ctrl+P
The equivalent visual element in the video has already been coded with “interaction: sibling”. Thus, there is no need to create a new quotation; we can link the mission quote to the already existing one:
- Drag the green quotation bar from the segment coded with” interaction: sibling” to the segment coded with the mission statement. This has been shown already in the section “Creating a chain link across regions”
- The relation editor opens. Select “Supports”
- Next, link the video quote also to the coded mission statement in the PDF document, selecting the relation “Supports” again
- In paragraph 10 of the transcript, there is another reference to inspiring optimism. As explained above, take a look at the associated video
 The relation editor opens. Select “Supports”
Figure 21: The list of available relations
 Put the cursor at the beginning of paragraph 10 in front of the word “Voice over”. The play head jumps to the start position. Begin to highlight the segment starting at this point and drag the mouse approximately over 5 preview images.
Position the cursor at the end of paragraph 10 after the word “(clapping)”. The play head jumps to the end of the associated segment.
Drag the end position to the play head. Once you are on top of it, the play head and the end position snap together. This is also indicated by a white line.
Click on the “create quotation” button.

Figure 22: Marking a segment with the help of the play head
Link the new quotation to the second mission segment in the transcript and in the PDF document.
All hyperlinks are displayed in the margin area as show in Figure 23.
NOTE: For better visibility the display of code labels has been deactivated (right click in the margin area, select and then deselect what you do not want to see).

Figure 23: Display of hyperlinks in a video document
Visualizing hyperlinks in a network view
- In the PDF document “ Coca-cola – Mission”, click on the mission code “to inspire moments of optimism to activate the quotation
- Right click on the highlighted quotation and select the option: Open Network View
You can further extend the network view by importing all quotations that have been coded with the mission code:
- Right click on the mission code node in the network view and select Import Neighbours / Import Quotations (see Figure 24)
- Position the imported quotation as you like. You can now see your evolving relations related to the mission statement “to inspired moments of optimism”

Figure 24: Network view on emerging relations around the mission statement: to inspire moments of optimism
You can access the data behind the network view by double clicking on one of the quotations. Video quotations are played immediately. If the document is loaded, they are played within the context of the PD. If the document is not loaded, a small video window opens and the video segment is played:

Figure 25: Accessing hyperlinked data from within network views
The ATLAS.ti word cruncher provides a list of all words that occur in a text, a group of texts or all texts. If you run a word count on only one document, you can use the built-in tool. For both, single documents and selected documents, you can use word clouds as well. The examples below are based on the data from case study B.
Word counts for a single document
- Select one of the documents in the P-Docs Manager and double click to load it
- From the main menu select Analysis / Word Cruncher
- Activate the options: “Include selected PD only” and “Built-in Tool” and click OK

Figure 26: Selecting word cruncher options
You can exclude words that you do not want to include in the count by editing the stop list (see below).
You can sort the results by clicking on the column headers:

Word counts for all documents
A second option is to export the word frequency count to Excel. If you do so, you can select to generate a word count of only the selected or of all documents. In order to do this,
- Open the Word Cruncher tool again. This time select Excel as output destination
- Further select the type of counts you want to include in the table: absolute, relative counts, row totals, column totals and word length. When preparing an Excel table for just one document, you can for example deactivate the row totals as the numbers are identical to the absolute and relative counts
Word Clouds
A different representation of word frequency counts are word clouds. Word clouds offer a quick way to explore your data and to give you an impression of important words used and issues to look for.
- Open the P-Docs Manager
- Right click on a document and select the option Word Cloud from the context men
Move the limit slider to select how often a word should occur to be displayed in the cloud

Figure 28: A word cloud on a single document
- To remove words from the cloud temporarily or permanently so that they are not counted in other outputs as well, right click on a word.

Figure 29: Removing words from the cloud and adding them to the stop list
Editing the stop list
In addition to add words to the stop list directly from a word cloud view, you can also manually edit the stop list.
To open the stop list, click on the Edit Stoplist button in the Word Cruncher tool. A text file opens. It contains some instruction on how to handle the stop list (see Figure 11)

Figure 30: Adding words that you do not want to count to the stop list
- To exclude single words, enter a word per line below the instructional text. In the instruction it is stated that upper case letters need to be used. This is no longer the case
- When you are done, save the stop list: File / Save and close it
Comparing word counts of document groups
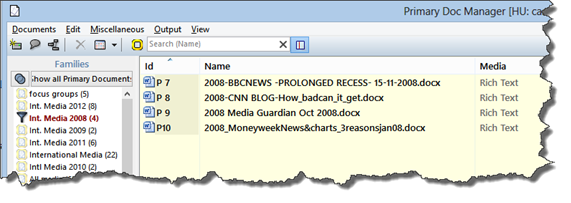
Let’s get an impression of what kinds of issues have been mentioned in the years 2008 vs. 2012 in local and international papers. This can be done by working with document families as global filters.
- Open the PDocs Manager
- Right click on the PD family “Int. Media 2008” and select the option Set global filter. This reduces the entire list of documents to the four 2008 international articles included in case study B
The family name is shown in dark red letters and the family icon has changed. Take a closer look: it looks like a little funnel. The background colour changed to pale yellow.
NOTE: A pale yellow background colour is always an indicator that a filter is active.
If you run a word count table, only the documents listed in the active filter are included.
- Next, select the Word Cruncher option from the main menu as we want a word count based on multiple documents: Select Analysis / Word Cruncher
- Deactivate the following options: include selected PD only; separate counts for each PD as we want the aggregate count per selected family; and word lengths (unless you want to clean up the list in Excel and delete short words)

Figure 31: Settings for running a word count on multiple documents
- You need to create four outputs and copy the respective results into one table
- Rename the column “total” to “Int. Media 2008”, etc
- Sort the data by the word count column for each year using the user defined sort option in Excel

Figure 32: Word cruncher results comparing four document groups
The word count tables and the word clouds provide an idea of what kinds of issues are covered. These ideas can now be further explored by auto coding those instances that raised your interest. For instance Greece pops up to be a quite frequent issue in the 2012 international reports. We however also know that the financial crisis also caused severe problems in countries like Spain, Portugal, Ireland or Italy. Germany, France and the UK are affected differently and have different roles. Let’s explore which of these countries are actually mentioned in the news articles between 2008 and 2012. This can be achieved via the auto coding tool.
- At first, reset all filters: Tools / Reset all filters
- To open the auto coding tool, select Codes / Coding / Auto coding

Figure 33: Auto coding settings
- Click on the button New Code and enter a new code word, e.g. country: Greece (why I use “.country: Greece” as code word is explained in the exercises for chapter 7)
- If you want to use multiple search words, activate the Use GREP (regular expressions) option
- As search term enter Greece|greek, whereby the | is the regular expression for OR
- We only want to search in the newspaper articles, not in the focus group data. Therefore, activate the PD Family option and select the family “All media”
- Next select the amount of text that should be coded. Depending on the type of data you are asking and the knowledge on how it looks like, make an adequate decision. As media data usually contains rather short paragraph, the option “Single Hart Return” works probably quite well
NOTE: The option “Multiple Hard Returns” means all text up to the next empty line is coded. This can for instance be used for focus group data if speaker units are separated by a blank line.
- Repeat the process searching for sections on Italy, Spain, Ireland, France, Germany and the UK
Cleaning up results of auto coding
Next, you need to do some cleaning up. A computer can find words, but it cannot interpret meaning. This means you have to go through the coded segments, adjust the length of the segments if necessary, or delete quotations that appear to be unfitting.
- Open the Code Manager and double click on one of the country codes, e.g. Ireland
- The list of coded segments (=quotations) opens. Click on the first quotation. The document (P13) that contains this quotation will be loaded and you can see it in context

- As the entire document is on Ireland and no other country is mentioned, we do not need all of the single segments. It makes more sense in this case to code the entire document. This means enlarging the first segment and deleting all other ones
How to modify and delete coded segments is explained in chapter 4. As the document is not coded yet with other codes, an easy option is to open the Quotation Manager, highlight all but the first quotation with the ID 13:x and delete them.
NOTE: In other cases, if a code applies to an entire document it makes more sense to create a document family. But here we have a mixture of documents where sometimes an entire article is on a particular country and other times only sub sections of the article refer to this country, it is more feasible to work with codes.
In the next document (P16), the situation is a different one. There the author mentions a number of different countries.
- Read through the segments and check whether you find the selection appropriate. Adjust them if necessary

Figure 35: Double-checking auto coded segments
The next exercises focus on tasks associated with coding - Chapter 7, 8 and 9 focus on various ways of generating and assigning codes, retrieval and the manipulation of the coding scheme.
Susanne Friese