Using Software in Qualitative Research
A Step-by-Step Guide
Chapter 11 – Mapping (Nvivo)
CHAPTER 11 discusses some of the varying principles, functions and rationales behind mapping tools where they are available in software. Mapping in a graphic sense may relate to theoretical models or simply be a way of stepping back from the data to express, visualize and communicate connections that are beginning to be observed.
Sections included in the chapter:
Traditions of mapping
Specific functions and specialities
Mapping to express theory
Expressing links between text passages
Visualizing co-occurring codes
Linking concepts
Layers, creating, hiding and revealing them
In NVivo the mapping tool is called the Modeler. (These exercises are largely complied using other sample data.)
Models are another visual way to represent what is happening in your project or ideas you have about how various things may be connected. Models are comprised of shapes and connectors which can represent project items, if desired. Models are created by adding these shapes to a blank “sheet”. New models are created like any other new project item – from the List pane, using the Project menu, or via the New button. (We’ll use the first method here.)
- In the Navigation pane, click on the Models section, and then click in the List pane. R-click and choose New Model
- OR in Explore Ribbon tab>New Model
- In the New Model window, enter a name and (optionally) a description. When you click OK, a new blank model is displayed in the Detail pane
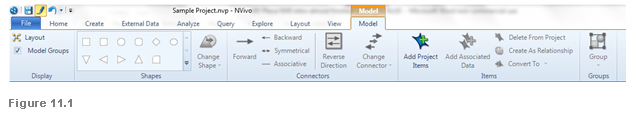
- You can add empty/abstract shapes click once on a shape in the Shapes palette on the left or R-click > New Shape)
- Or add project items R-click > Add Project Items – see Figure 11.2. below

Figure 11.2
- Add connectors from one shape or project item to another by clicking on the source object and then holding Ctrl and clicking on the target object, and then R-click (on target object) > New Connector
- Add names to abstract shapes that you have added by double clicking quickly to get the properties box up, or double-clicking slowly to enter a label in the background - on them to go to their Properties (also accessible by R-click)
Explore connections
One way to utilize a Model is to explore the connections the project items in your Model have to each other by adding Associated Data. To do this:
- R-click on a project item of interest already in your Model
- Choose ‘Add Associated Data…’

Figure 11.3
3. The Add Associated Data box appears, asking you to choose any other items you want to see on the Model to which the item is connected.
- Note you can bring in new project items this way
- Or you can have NVivo display connections between items already in your Model
- Or If you right click on any item in a model you can choose to add associated data
As you add project items, those already in the Model are greyed out in the Select window so you can’t add an item twice. You can begin to see how the model allows you to look in on your project and progress from above – to see what connections have been made – where the exceptions are. See illustration below. The community minded node is sitting in 4 files – but not in Mary or Grace – is there a reason for that? Does that need investigating?
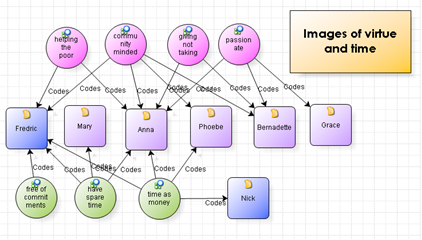
The model above, for example, starts to give an idea of the different images that men and women interviewees have about volunteers.